This thing is big! It makes a very satisfying thunk when placed on the table. I tried for a natural colour on this model. Our local petting zoo has a herd of miniture goats that look similar to this guy... Less ramming thouugh.
Friday, 17 July 2009


Baldur the Stonecleaver
I spent the longest time thinking about Baldur's colour scheme. I wanted to get the red in there, but I didn't want him looking like Santa Claus. I think I still have to work on my technique of painting black because his armour didn't quite turn out how I wanted it but I'm happy enough with the look.
This is another model that looked terrible until I finished it. Getting the green into the metal was the point that tipped it over into what I was hoping it would look like when I started painting.


This is another model that looked terrible until I finished it. Getting the green into the metal was the point that tipped it over into what I was hoping it would look like when I started painting.


Friday, 26 June 2009
Lylyth vs Kreuger - Process of Elimination
Legion vs Circle - 500 points
Armies
Legion
Lylyth, Herald of Everblight
Typhon
Shredder
Shepherd
Warchief
Apostle + 3 Warmongers
Vassal + 7 Swordsmen
Gudrun the Wanderer
Swamp Gobbers
Circle
Kreuger, the Stormwrath
Warpwolf
Woldwarden
Gorax
Blackclad Wayfarer
Warder + 5 Wilder Druids of Oboros
Shifting Stones
Shifting Stones
Scenario
Process of Elimination-Divide the battlefield between the deployment zones into four 12" wide Territories running north to south. A player controls a Territory if he has one or more models completely within the Territoru abd his opponent has no models completely within the Terrirtory. For a unit to control a Territory all models in the unit still in play must be completely within the Territory. A warrior model must have a CMD greater than 1 to control a Territory. Ignore wild warbeasts and fleeing models when checking for control. A player scores one Control Point for each Territory he controls at the end of each of his turns. A player cannot score a Control Point for the same Territory more than once. Control Points cannot be scored during the first round of the game.
Starting on the first players first turn, a player wins when he has three or more Control Points.
Setup
I set up first, putting the Warmongers and Warchief on one side of the River. The rest I put on the other side with the Swordsmen in the centre, with Typhon a nd Lylyth to their right. The Shepherd and Shredder stood behind them, while Gudrun ended up being advance deployed behind a pillar to mencae the Druids.
Myantek set up the Blackclad on the far right with Shifting Stones 1 advance deployed in front. Moving right the Warpwolf was next along with the Gorax beside him. Kreuger was between the Gorax and the river. On the other side of the river was the Woldwarden and then the Druids, with Shifting Stones 2 advance deployed in front of them.
Circle
The Druids move and use the Devouring on Gudrun. They get the Crit Knockdown but fail to kill him. The Wold warden moves up but can't blast Gudrun since he's Feigning Death. The Warpwolf and Gorax both rile and run. Kreuger puts Lightening Tendrils on the Warpwolf and casts Skybourne and Windstorm, but is just out of range of the swamp cloud. The Blackclad runs forward and Shifting Stones 1 teleport to surround him. Stones 2 make a wall between Gudrun and the Druids.
Turn 2
Legion
Lylyth leaches all but is still down 1 fury. She doesn't upkeep Taint. The Shredder goes Rabid again and walks up to put Tenacity on Typhon. The Swordsmen run out of the way and spread out. Lylyth moves up and shoots at the Warpwolf. I'm a 1/4 inch short. Her next shot is directed at the Woldwarden, and there I'm 1/2 and inch short. Typhon runs to the bridge. The Shepherd moves up. the Gobbers move up and again put their smoke on Typhon. The Warmongers charge Shifting Stones 1 and kill one, while the Warchief retreats from the Gorax to behind the bridge. Gudrun gets up and walks to engage the Druids.
Circle
Kreuger leeches to full and upkeeps Lightening Tendrils on the Warpwolf. The Druids kill Gudrun (the first time). The Gorax moves up to the bridge while the Warpwolf takes +2 ARM and runs over the river to the bridge. The Blackclad teleports near to Lylyth. He is deemed expendable and the Wold Warden shoots Lightening at him, but it misses by one.
Kreuger casts Skybourne and advances behind the Warpwolf and Woldwarden. He then feats with Storm Ravager, killing 1 Swordsmen, 1 Swamp Gobber, and doing 4 wounds to the Shpeherd. Hits Lylyth and Typhon and rolls a double 6 for damage on each. Lylyth transfers and Typhon feels the pain, although no aspects are destroyed. Stones 1 Shift to block the Warmongers from the Gorax while Stones 2 block the Swordsmen from the Druids.
Turn 3
Typhon makes a Threshold check due to Kreugers feat and passes. Lylyth leeches and cuts herself for the fury lost to transfering. I start the turn with Gudrun, who stands up and mulches 3 Druids, including the leader. The Warchief charges Shifting Stones 1 but is just short, so the Warmongers have to content themselves with destroying the rest of the Shifting Stones instead of charging the Gorax.
Lylyth then uses her feat Field of Slaughter, but it isn't enough for her to hit effective DEF 21 Krueger with either of her boosted shots. I should have shot the Warpwolf and then cast Eruption of Spines instead. But then Typhon walks over and is able to use his reach to attack Kreuger through the gap between the Warp Wolf and Wold Warden. With Typhon's MAT 7 plus the extra die to hit from Field of Slaughter, Kreuger is quickly torn aprt with multiple attacks.
Not much to be said except Reach + MAT 7 for the win. This army was a change of pace from my usual beast heavy one, and the comparitive lack of mobility took a bit of getting used to. Gudrun was great at blocking the Druids and just being a general pain. The Warmongers and Warchief on the other hand didn't do anything but wander around and kill of 21 points worth of Shifting Stones. But the man of the match is obviously Typhon. An Angelius could have reached Krueger but probably would have had a hard time closing the deal. Typhon with his high MAT and multiple attacks is perfect for killing warlocks, and reach gives him the ability to use it.
The gap between the Warpwolf and the Woldwarden was just a little too big. I thought I was in a pretty good position for the next turn but I didn't quite count on Typhon. I don't know. I feel like there's something a little off about my Kreuger army but I'm not sure what it is. The Gorax hasn't done anything for me, but I don't know if I want to drop it in favour of something else. Something needs tweaking.
Armies
Legion

Lylyth, Herald of Everblight
Typhon
Shredder
Shepherd
Warchief
Apostle + 3 Warmongers
Vassal + 7 Swordsmen
Gudrun the Wanderer
Swamp Gobbers
Circle

Kreuger, the Stormwrath
Warpwolf
Woldwarden
Gorax
Blackclad Wayfarer
Warder + 5 Wilder Druids of Oboros
Shifting Stones
Shifting Stones
Scenario
Process of Elimination-Divide the battlefield between the deployment zones into four 12" wide Territories running north to south. A player controls a Territory if he has one or more models completely within the Territoru abd his opponent has no models completely within the Terrirtory. For a unit to control a Territory all models in the unit still in play must be completely within the Territory. A warrior model must have a CMD greater than 1 to control a Territory. Ignore wild warbeasts and fleeing models when checking for control. A player scores one Control Point for each Territory he controls at the end of each of his turns. A player cannot score a Control Point for the same Territory more than once. Control Points cannot be scored during the first round of the game.
Starting on the first players first turn, a player wins when he has three or more Control Points.
Setup
I set up first, putting the Warmongers and Warchief on one side of the River. The rest I put on the other side with the Swordsmen in the centre, with Typhon a
 nd Lylyth to their right. The Shepherd and Shredder stood behind them, while Gudrun ended up being advance deployed behind a pillar to mencae the Druids.
Myantek set up the Blackclad on the far right with Shifting Stones 1 advance deployed in front. Moving right the Warpwolf was next along with the Gorax beside him. Kreuger was between the Gorax and the river. On the other side of the river was the Woldwarden and then the Druids, with Shifting Stones 2 advance deployed in front of them.
Turn 1
Legion
The Warmongers run forward followed by the Warchief. Lylyth casts Taint on Typhon, casts Tenacity on Typhon and herself, and moves up. The Swamp Gobbers move up and put smoke on Typhon. The Swordsmen and Shepherd then run into position. The Shredder puts Tenacity on itself, goes Rabid, and moves up beside Lylyth. Gudrun runs to the pillar.
Circle
The Druids move and use the Devouring on Gudrun. They get the Crit Knockdown but fail to kill
 him. The Wold warden moves up but can't blast Gudrun since he's Feigning Death. The Warpwolf and Gorax both rile and run. Kreuger puts Lightening Tendrils on the Warpwolf and casts Skybourne and Windstorm, but is just out of range of the swamp cloud. The Blackclad runs forward and Shifting Stones 1 teleport to surround him. Stones 2 make a wall between Gudrun and the Druids.
Turn 2
Legion
Lylyth leaches all but is still down 1 fury. She doesn't upkeep Taint. The Shredder goes Rabid again and walks up to put Tenacity on Typhon. The Swordsmen run out of the way and spread out. Lylyth moves up and shoots at the Warpwolf. I'm a 1/4 inch short. Her next shot is directed at the Woldwarden, and there I'm 1/2
 and inch short. Typhon runs to the bridge. The Shepherd moves up. the Gobbers move up and again put their smoke on Typhon. The Warmongers charge Shifting Stones 1 and kill one, while the Warchief retreats from the Gorax to behind the bridge. Gudrun gets up and walks to engage the Druids.
Circle
Kreuger leeches to full and upkeeps Lightening Tendrils on the Warpwolf. The Druids kill Gudrun (the first time). The Gorax moves up to the bridge while the Warpwolf takes +2 ARM and runs over the river to the bridge. The Blackclad teleports near to Lylyth. He is deemed expendable and the Wold Warden shoots Lightening at him, but it misses by one.
Kreuger casts Skybourne and advances behind the Warpwolf and Woldwarden. He then feats
 with Storm Ravager, killing 1 Swordsmen, 1 Swamp Gobber, and doing 4 wounds to the Shpeherd. Hits Lylyth and Typhon and rolls a double 6 for damage on each. Lylyth transfers and Typhon feels the pain, although no aspects are destroyed. Stones 1 Shift to block the Warmongers from the Gorax while Stones 2 block the Swordsmen from the Druids.
Turn 3
Legion
Typhon makes a Threshold check due to Kreugers feat and passes. Lylyth leeches and cuts herself for the fury lost to transfering. I start the turn with Gudrun, who stands up and mulches 3 Druids, including the leader. The Warchief charges Shifting Stones 1 but is just short, so the Warmongers have to content themselves with destroying the rest of the Shifting Stones instead of charging the Gorax.
Lylyth then uses her feat Field of Slaughter, but it isn't enough for her to hit effective DEF 21 Krueger with either of her boosted shots. I should have shot the Warpwolf and then cast Eruption of Spines instead. But then Typhon walks over and is able to use his reach to attack Kreuger through the gap between the Warp Wolf and Wold Warden. With Typhon's MAT 7 plus the extra die to hit from Field of Slaughter, Kreuger is quickly torn aprt with multiple attacks.
Afterward
Defenstrator
Defenstrator
Not much to be said except Reach + MAT 7 for the win. This army was a change of pace from my usual beast heavy one, and the comparitive lack of mobility took a bit of getting used to. Gudrun was great at blocking the Druids and just being a general pain. The Warmongers and Warchief on the other hand didn't do anything but wander around and kill of 21 points worth of Shifting Stones. But the man of the match is obviously Typhon. An Angelius could have reached Krueger but probably would have had a hard time closing the deal. Typhon with his high MAT and multiple attacks is perfect for killing warlocks, and reach gives him the ability to use it.
Myantek
The gap between the Warpwolf and the Woldwarden was just a little too big. I thought I was in a pretty good position for the next turn but I didn't quite count on Typhon. I don't know. I feel like there's something a little off about my Kreuger army but I'm not sure what it is. The Gorax hasn't done anything for me, but I don't know if I want to drop it in favour of something else. Something needs tweaking.
Shepherds & Shredders
I should have posted these awhile ago. I'd like to claim being busy but I was just being lazy. The Shredders are from my second Legion box. The Carnivean won't be for awhile as I plan to convert him up. The Shpeherds are pretty straight forward, with only a minor conversion to one of them. I doubt I'll paint more of either unless I go for a Shredder Swarm army.


Tuesday, 26 May 2009
Warmongers
So I finaly have painted up a unit for my Legion. Until now it has all been chracters, solos, and beasts. These guys took me about 3 months, but mainly that was because I started them in March and then kept doing other more interesting projects instead. I got so tired of having them sitting around that I just buckled down and did them. In general I am happy with how they turned out, although I think I may have mde the armour a bit too shiny and bright.


Tuesday, 12 May 2009
Shadow of the Valley
Legion vs Circle - 500/750 points
No Quarter No. 23 had some special scenarios based on recent battles in the Iron Kingdoms. Shadow of the Valley represents the battle between the Legion of Everblight and the Circle Orboros that's presented in Metamorphosis. So, of course, we had to try it.
Scenario
Morvahna the Autumnblade has pursued the Legion forces from the Castle of the Keys, through eastern Llael, and to the borders of Rhul and Ios. The army has been extended beyond their reserves and reinforcements, leaving the slower elements behind. The Nyss and thier dragonspawn have been caught in a valley and Morvahna beleives that she can deal the Legion a fatal blow.
What she doesn't know is that the valley has been chosen as a rendezvous point for the Legion. Reserves, led by Absylonia, are fresh dragonspawn and the newly transformed Thagrosh the Messiah. She attacks and hundreds of drawnspawn swarm from the mountains, inflicting horrible causualties to the Circle army. Only the timely intervention of Kaya the Moonhunter allows Morvahna to escape.
Special Rules
The Circle army is 750 points and all Circle models gain the Advance Deployment ability to represent the army close on the heels of the Legion.
The Legion player begins with only 500 points, but beginning on round 3, the Legion player can put an additional 150 points of Legion warbeasts into play at the start of the Maintenance phase. The warbeasts start in contact with the rear edge of the Legion player's deployment zone. They may activate the turn they are put in play.
The table should be moderately to heavily covered with terrain features consisting of only forests, hills and rocky ground.
Circle Army Composition
Warlocks: Either Morvahna the Autumnblade or Kaya the Moonhunter
Warbeasts: Any except for elemental constructs.
Units: Any except Shifting Stones and elemental constructs.
Solos: Any except for Senty Stones
Minions: Brun Cragback & Lug and Lanyssa Ryssyl
Legion Army Composition
Warlocks: Absylonia, Ryhas, Saeryn, Thagrosh the Messiah or Vayl
Warbeasts: Any
Units: A maximum of two units chosen from Blighted Archers (and UA), Blighted Swordsmen (and UA), Blighted Legionnaires, Striders, Warmongers and Warspears
Solos: Any
Minions: None
Beginning: The Legion player deploys first and takes the first turn. Players deploy their forces 10" from the table edge.
Victory Conditions: The player with the last warlock standing wins.
Legion
Thagrosh, the Messiah
Angelius
Angelius
Carnivean
Shepherd
498 points
Circle
Kaya the Moonhunter and Laris
Pureblood Warpwolf
Warpwolf
Warpwolf
Argus
Argus
Huntress and 9 Tharn Bloodtrackers
Huntsman and 9 Wolves of Orboros with Officer and Totem Bearer
747 points
Set Up

As suggested by the scenario, the table top was fairly dense with terrain. Down both short sides were three clumps of rocks representing difficult terrain with more rocks littering the centre of the board. Two hills stood opposite one another near the centre of the board with small copses of trees at their points.
Legion
In a line, starting behind the small copse of trees, Defenstrator placed Angelius 2, Thagrosh, Angelius 1, the Carnivean and the Shepherd.
Circle

With the advantage of Advanced Deployment the Circle forces were further up the field. Argus 2 and Warwolf 2 were in front of the hill behind a small jutting of rock. Kaya, Laris and the Purblood were sitting on the hill and Warpwolf 1 was on the slope beside them. Argus 1 was in front of the small copse of trees. The Wolves fanned out in the rocky terrain and the Bloodtrackers were beside them.
Legion Turn 1
Thagrosh began by casting Dragon's Blood on the Carnivean, Unnat ural Aggression on Angelius 2 and Spiny Growth on himself. He then moved to the top of the hill.
The Carnivean cast Spiny Growth on itself and moved forward onto the hill while both Angelius riled for 1 Fury and ran. Angelios 1 ran in front of the hill and behind the rock and Angelius 2 ran up behind the Carnivean. The Shepherd moved up onto the hill.
Circle Turn 1

At the beginning of the game the Bloodtrackers chose Thagrosh as their Prey.
Argus 1 moved up to the rocks and was joined by Warpwolf 1. The Warpwolf warped to give himslef +2 ARM. The Pureblood moved off the hill to the opposite side of the rocks while Warpwolf 2 moved along the hill and also warped to give himself +2 ARM. Argus 2 ran up the field near the rock formation near the centre of the board's short side.
Kaya moved along the hill and cast Forced Evolution on the Pureblood. Laris ran in the opposite direction of Kaya.
The Woves ran toward the hill and the Bloodtrackers ran into the rock formation.
Legion Turn 2
Thagrosh leached to full Fury and upkept both Dragon's Blood and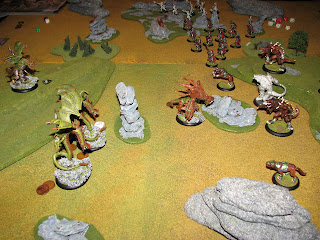 Unnatural Aggression. He then moved behind the Carnivean and cast Glory of Everblight and then Spiny Growth on the Carnivean.
The Carnivean assaulted Warpwolf 1 with a spray attack that did 10 points of damage. Angelius 1 shot the same Warpwolf but did no damage.
The Shepherd moved behind Angelius 1 and Angelius 2 riled and ran to join it.
Circle Turn 2

Kaya leached to full Fury and upkept Forced Evolution.
The Bloodtrackers ran forward through the rocks and were followed by the Woves.
Argus 2 barked at the Carnivean and paralysed it. Kaya then cast Dogpile on the Carnivean and moved forward on the hill.
Argus 1 moved forward to the rock and barked to paralyse Angelius 2.
The Pureblood gave Ferosity to himself and Warpwolf 1. With Dogpile on the Carnivean he was able to charge it through rough terrain and for free. Warpwolf 1 was able to charge it through the terrain as well and together the two did enough damage to kill the dragonspawn. The Spiny Growth did almost as much damage to the two as they did to the Carnivean. Thagrosh reaved the Fury that was sitting on the Carnivean.
Warpwolf 2 walked down off the hill and Laris moved down behind the rock.
Legion Turn 3
Defenstrator is able to add a Nephelim, Harrier and two Shred ders to the very back of his deploment zone. Thagrosh leached to full Fury and choose not to upkeep anything.
Shredder 1 walked forward toward the forest and gave itself Tenacity once it reached Thagrosh's command area. Shredder 2 went Rabid and ran forward to engage a Bloodtracker. The Harrier ran up the hill and the Nephelim ran in front of Thagrosh.
Thagrosh cast Glory of Everblight and charged the Pureblood. With reach he was close enough to attack. The first 11 points were transferred to Warpwolf 2, the second attack missed but the third killed the Pureblood in an eruption of ash.
Angelius 2 shot and killed the heavily wounded Warpwolf 1 (Kaya reaved the Fury as he died) and Angelius 2 charged the Wolves. It killed the first and then killed two more by being Ravenous. The Shepherd ran behind Angelius 2.
Circle Turn 3
Kaya leached to full Fury but had to leave 1 Fury on Argus 2 . He passed his threashold check and did not Frenzy.
Argus 2 slamed Thagrosh, boosting to hit. I needed to roll a 12 and I rolled a 13. With a boosted roll to damage the Argus did 4 points and pushed Thagrosh 2 inches back towards the hill. That gave just enough room for the Bloodtrackers to Ambuscade their Prey. They rolled and passed their Leadership test to move toward the Abomination. Then it was the death of a thousand needles as the Bloodtrackers did a lot of little damage. There was one hit for 5 damage that produced a Shredder but that didn't save Thagrosh from being hit by javelins and one hit of 8 points that Defenstrator decided to transfer. Eight of the Bloodtrackers were able to Ambuscade. One was locked in position with the Shredder and one stayed back to maintain unit coherancy.
Afterward
Myantek
I initially went into this feeling really constricted. There were only two warlocks I could take and I've never played Morvahna. With epic Kaya I like to take the Woldwyrd and the Sentry Stone but no luck with this scenario. I decided to go wolf heavy with the Pureblood and two Warpwolves and then stick to Argus for the speed. I didn't expect to do more with the Argus than maybe spread out his force a little or stand in the way of something. The Bloodtrackers and Wolves are two big units that could both do damage to epic Thagrosh and cause him some trouble because of Hubris. I knew Defenstrator likes to play beast heavy, and that he'd probably be taking the two Angelius so my plan was to set my heavies on his heavies and then use the troops and Kaya to take down Thagrosh.
That's pretty much what I did. The third turn came faster than I was expecting it to so I wasn't quite in the position that I wanted to be in before I had to worry about the reinforcements. Slamming with the Argus was a bit of a gamble but I figured that if it worked I'd be in a really good position becase Thagrosh would be knocked down and if it didn't work I could still send in Kaya and Laris. I thought about trying to kill the Angelius with the Wolves (I think they could've done it) but I didn't want to give all that Fury to Thagrosh for transferring.
This was the first time I was able to get the Bloodtrackers to Ambuscade on their Prey. It was much more effective than I thought it was going to be. The girls really came through for me. Actually, as a whole I was pretty happy with this army. I could see playing it again. Although, as much as I love Argus, one of them would be dropped for a Woldwyrd.
Defenstrator
I thought I was safe, then died. This seems to happen quite often against the Circle Oboros. Tucked in behind the rocks the second Warpwolf couldn't get to me, and the Angelius blocked LOS to the Wolves and Bloodtrackers. The only one who could reach me was Kaya, and she doesn't have the power to beat Thagrosh down in one turn unless there are a bunch of enemies nearby to boost Kaya. What I didn't count on was the Argus. A decent distance away and at -4 to hit on power attacks he seemed a minimal threat, but he caught me on the slam and shoved Thagrosh just far enough to get him right into the open, where pincushion death quickly followed.
In general I was happy with how I played. I armoured up then sacrificed the Carnivean to get the counter attack and kill the Pureblood and Warpwolf 1. My goal was to kill all the heavy hitters while staying away from the troops, and then grind Myantek down under my waves of beasts. Unfortunately my first beast wave didn't accomplish anything. The Bloodtrackers were too far away for me to tie up effectively, and they basicly showed up to become witnesses to Thagrosh's death. I had made sure I had a bunch with one fury on them to chain damage onto, but never took a hit large enough to kill one and reeve new fury. Popping my feat was a possibility, as I could have used the extra movement to tie up more Bloodtrackers, but I was hoping to use it turn 4 where it would be more effective with the first wave of beasts and help get the second wave up the table. Death, of course, precluded that, but hindsight is 20/20 and I thought that was going to make it through to my next turn. I would be curious to try this scenario again with different warlocks, and perhaps we will do so in the future.
No Quarter No. 23 had some special scenarios based on recent battles in the Iron Kingdoms. Shadow of the Valley represents the battle between the Legion of Everblight and the Circle Orboros that's presented in Metamorphosis. So, of course, we had to try it.
Scenario
Morvahna the Autumnblade has pursued the Legion forces from the Castle of the Keys, through eastern Llael, and to the borders of Rhul and Ios. The army has been extended beyond their reserves and reinforcements, leaving the slower elements behind. The Nyss and thier dragonspawn have been caught in a valley and Morvahna beleives that she can deal the Legion a fatal blow.
What she doesn't know is that the valley has been chosen as a rendezvous point for the Legion. Reserves, led by Absylonia, are fresh dragonspawn and the newly transformed Thagrosh the Messiah. She attacks and hundreds of drawnspawn swarm from the mountains, inflicting horrible causualties to the Circle army. Only the timely intervention of Kaya the Moonhunter allows Morvahna to escape.
Special Rules
The Circle army is 750 points and all Circle models gain the Advance Deployment ability to represent the army close on the heels of the Legion.
The Legion player begins with only 500 points, but beginning on round 3, the Legion player can put an additional 150 points of Legion warbeasts into play at the start of the Maintenance phase. The warbeasts start in contact with the rear edge of the Legion player's deployment zone. They may activate the turn they are put in play.
The table should be moderately to heavily covered with terrain features consisting of only forests, hills and rocky ground.
Circle Army Composition
Warlocks: Either Morvahna the Autumnblade or Kaya the Moonhunter
Warbeasts: Any except for elemental constructs.
Units: Any except Shifting Stones and elemental constructs.
Solos: Any except for Senty Stones
Minions: Brun Cragback & Lug and Lanyssa Ryssyl
Legion Army Composition
Warlocks: Absylonia, Ryhas, Saeryn, Thagrosh the Messiah or Vayl
Warbeasts: Any
Units: A maximum of two units chosen from Blighted Archers (and UA), Blighted Swordsmen (and UA), Blighted Legionnaires, Striders, Warmongers and Warspears
Solos: Any
Minions: None
Beginning: The Legion player deploys first and takes the first turn. Players deploy their forces 10" from the table edge.
Victory Conditions: The player with the last warlock standing wins.
Legion
Thagrosh, the Messiah

Angelius
Angelius
Carnivean
Shepherd
498 points
Circle
Kaya the Moonhunter and Laris

Pureblood Warpwolf
Warpwolf
Warpwolf
Argus
Argus
Huntress and 9 Tharn Bloodtrackers
Huntsman and 9 Wolves of Orboros with Officer and Totem Bearer
747 points
Set Up

As suggested by the scenario, the table top was fairly dense with terrain. Down both short sides were three clumps of rocks representing difficult terrain with more rocks littering the centre of the board. Two hills stood opposite one another near the centre of the board with small copses of trees at their points.
Legion
In a line, starting behind the small copse of trees, Defenstrator placed Angelius 2, Thagrosh, Angelius 1, the Carnivean and the Shepherd.

Circle

With the advantage of Advanced Deployment the Circle forces were further up the field. Argus 2 and Warwolf 2 were in front of the hill behind a small jutting of rock. Kaya, Laris and the Purblood were sitting on the hill and Warpwolf 1 was on the slope beside them. Argus 1 was in front of the small copse of trees. The Wolves fanned out in the rocky terrain and the Bloodtrackers were beside them.
Legion Turn 1
Thagrosh began by casting Dragon's Blood on the Carnivean, Unnat
 ural Aggression on Angelius 2 and Spiny Growth on himself. He then moved to the top of the hill.
The Carnivean cast Spiny Growth on itself and moved forward onto the hill while both Angelius riled for 1 Fury and ran. Angelios 1 ran in front of the hill and behind the rock and Angelius 2 ran up behind the Carnivean. The Shepherd moved up onto the hill.
Circle Turn 1

At the beginning of the game the Bloodtrackers chose Thagrosh as their Prey.
Argus 1 moved up to the rocks and was joined by Warpwolf 1. The Warpwolf warped to give himslef +2 ARM. The Pureblood moved off the hill to the opposite side of the rocks while Warpwolf 2 moved along the hill and also warped to give himself +2 ARM. Argus 2 ran up the field near the rock formation near the centre of the board's short side.
Kaya moved along the hill and cast Forced Evolution on the Pureblood. Laris ran in the opposite direction of Kaya.
The Woves ran toward the hill and the Bloodtrackers ran into the rock formation.
Legion Turn 2
Thagrosh leached to full Fury and upkept both Dragon's Blood and
 Unnatural Aggression. He then moved behind the Carnivean and cast Glory of Everblight and then Spiny Growth on the Carnivean.
The Carnivean assaulted Warpwolf 1 with a spray attack that did 10 points of damage. Angelius 1 shot the same Warpwolf but did no damage.
The Shepherd moved behind Angelius 1 and Angelius 2 riled and ran to join it.
Circle Turn 2

Kaya leached to full Fury and upkept Forced Evolution.
The Bloodtrackers ran forward through the rocks and were followed by the Woves.
Argus 2 barked at the Carnivean and paralysed it. Kaya then cast Dogpile on the Carnivean and moved forward on the hill.
Argus 1 moved forward to the rock and barked to paralyse Angelius 2.
The Pureblood gave Ferosity to himself and Warpwolf 1. With Dogpile on the Carnivean he was able to charge it through rough terrain and for free. Warpwolf 1 was able to charge it through the terrain as well and together the two did enough damage to kill the dragonspawn. The Spiny Growth did almost as much damage to the two as they did to the Carnivean. Thagrosh reaved the Fury that was sitting on the Carnivean.
Warpwolf 2 walked down off the hill and Laris moved down behind the rock.
Legion Turn 3
Defenstrator is able to add a Nephelim, Harrier and two Shred
 ders to the very back of his deploment zone. Thagrosh leached to full Fury and choose not to upkeep anything.
Shredder 1 walked forward toward the forest and gave itself Tenacity once it reached Thagrosh's command area. Shredder 2 went Rabid and ran forward to engage a Bloodtracker. The Harrier ran up the hill and the Nephelim ran in front of Thagrosh.
Thagrosh cast Glory of Everblight and charged the Pureblood. With reach he was close enough to attack. The first 11 points were transferred to Warpwolf 2, the second attack missed but the third killed the Pureblood in an eruption of ash.
Angelius 2 shot and killed the heavily wounded Warpwolf 1 (Kaya reaved the Fury as he died) and Angelius 2 charged the Wolves. It killed the first and then killed two more by being Ravenous. The Shepherd ran behind Angelius 2.
Circle Turn 3
Kaya leached to full Fury but had to leave 1 Fury on Argus 2
 . He passed his threashold check and did not Frenzy.
Argus 2 slamed Thagrosh, boosting to hit. I needed to roll a 12 and I rolled a 13. With a boosted roll to damage the Argus did 4 points and pushed Thagrosh 2 inches back towards the hill. That gave just enough room for the Bloodtrackers to Ambuscade their Prey. They rolled and passed their Leadership test to move toward the Abomination. Then it was the death of a thousand needles as the Bloodtrackers did a lot of little damage. There was one hit for 5 damage that produced a Shredder but that didn't save Thagrosh from being hit by javelins and one hit of 8 points that Defenstrator decided to transfer. Eight of the Bloodtrackers were able to Ambuscade. One was locked in position with the Shredder and one stayed back to maintain unit coherancy.
Afterward
Myantek
I initially went into this feeling really constricted. There were only two warlocks I could take and I've never played Morvahna. With epic Kaya I like to take the Woldwyrd and the Sentry Stone but no luck with this scenario. I decided to go wolf heavy with the Pureblood and two Warpwolves and then stick to Argus for the speed. I didn't expect to do more with the Argus than maybe spread out his force a little or stand in the way of something. The Bloodtrackers and Wolves are two big units that could both do damage to epic Thagrosh and cause him some trouble because of Hubris. I knew Defenstrator likes to play beast heavy, and that he'd probably be taking the two Angelius so my plan was to set my heavies on his heavies and then use the troops and Kaya to take down Thagrosh.
That's pretty much what I did. The third turn came faster than I was expecting it to so I wasn't quite in the position that I wanted to be in before I had to worry about the reinforcements. Slamming with the Argus was a bit of a gamble but I figured that if it worked I'd be in a really good position becase Thagrosh would be knocked down and if it didn't work I could still send in Kaya and Laris. I thought about trying to kill the Angelius with the Wolves (I think they could've done it) but I didn't want to give all that Fury to Thagrosh for transferring.
This was the first time I was able to get the Bloodtrackers to Ambuscade on their Prey. It was much more effective than I thought it was going to be. The girls really came through for me. Actually, as a whole I was pretty happy with this army. I could see playing it again. Although, as much as I love Argus, one of them would be dropped for a Woldwyrd.
Defenstrator
I thought I was safe, then died. This seems to happen quite often against the Circle Oboros. Tucked in behind the rocks the second Warpwolf couldn't get to me, and the Angelius blocked LOS to the Wolves and Bloodtrackers. The only one who could reach me was Kaya, and she doesn't have the power to beat Thagrosh down in one turn unless there are a bunch of enemies nearby to boost Kaya. What I didn't count on was the Argus. A decent distance away and at -4 to hit on power attacks he seemed a minimal threat, but he caught me on the slam and shoved Thagrosh just far enough to get him right into the open, where pincushion death quickly followed.
In general I was happy with how I played. I armoured up then sacrificed the Carnivean to get the counter attack and kill the Pureblood and Warpwolf 1. My goal was to kill all the heavy hitters while staying away from the troops, and then grind Myantek down under my waves of beasts. Unfortunately my first beast wave didn't accomplish anything. The Bloodtrackers were too far away for me to tie up effectively, and they basicly showed up to become witnesses to Thagrosh's death. I had made sure I had a bunch with one fury on them to chain damage onto, but never took a hit large enough to kill one and reeve new fury. Popping my feat was a possibility, as I could have used the extra movement to tie up more Bloodtrackers, but I was hoping to use it turn 4 where it would be more effective with the first wave of beasts and help get the second wave up the table. Death, of course, precluded that, but hindsight is 20/20 and I thought that was going to make it through to my next turn. I would be curious to try this scenario again with different warlocks, and perhaps we will do so in the future.
Thursday, 7 May 2009
Epic Thagrosh
I finaly have eThagrosh painted up. Even if I spent most of April playing Warmachine MKII he is just too cool a model to let sit there. All in all I found him to be alot of fun. It was like painting one of my beasts but kicked up a notch with all the extra detail.


His skin and bones were my standard GW Catachan Green to Camo Green and Scorched Brown to Vermin Fur/ Blazing Orange mix. The metal was Chainmail washed with Taimya smoke and then highlighted with Chainmail and Mithril Silver. The gold detailing was Shining Gold washed with Privateer Brown Ink, and then highlighted with Shining Gold and Burnished Gold. The Leather was Scorched Brown washed with Devlan Mud wash and then highlighed to a SnakebiteLeather/ Bubonic Brown mix, with a little more Devlan Mud applied in spots. The purple was Lich Purple highlighted with Liche Purple/ Fortress Grey mix and then washed with Leviathan Purple wash.


Subscribe to:
Posts (Atom)