Tuesday, 31 March 2009


Sunday, 29 March 2009
Epic Thagrosh vs Epic Irusk
750 Points- Legion vs Khador
Khador
Supreme Kommandant Irusk
Scenario
My set up put Harrier 1 on my far left, but not as for over as the Kazny. Beside it was Forsaken 1 with Angelius 1, Seraph 1 and Angelius 2 behind the trees. Epic Thagsoh stood in the open with Forsaken 2 beside him and the Swamp Gobbers over 3" behind. Seraph 2 and Harrier 2 were close beside with the Raptors positioned on my far right.
Turn 1
The Kazny run forward with Markov beside them. The Man o' War and Iron Fangs move forward and Shield Wall, while the Uhlans run up the flank. Irusk and Wardog then move up behind the Man o' War and casts Artifice of Deviation in the woods and Tactical Supremacy on the Man o' War. The Demo Core then run through the woods while the Great Bears run up behind the Iron Fangs. The Man O' War then take their Tactical Supremacy 3 inch move.
Legion
I begin with Thagrosh and start by casting Slipstream, Unnatural Aggression on Angelius 2, and Dragon's Blood on Seraph 2. Thagrosh then moves forward, slipstreaming Seraph 2, and ends with his base partially in the woods. Seraph 1 Slipstreams Angelius 1 and ends in the woods. Angelius 2 then runs forward to the broken wall. Forsaken 1 moves up and takes the fury off Serpah 1. Seraph 2 runs forward and Forsaken 2 move up and takes the fury off him. Harrier 2 runs forward to screen the approach to Thagrosh. Angelius 1 and Harrier 1 run to the centre of the ruin. Finaly the Raptors move up, shoot at the Uhlans doing nothing before backing off a little, while the Swamp Gobbers move up and put the cloud on Thagrosh, Forsaken 2 and Harrier 2.
Turn 2
Khador
Thagrosh leeches to full and upkeeps Dragon's Blood on Seraph 2. He then starts the turn by casting Glory of Everblight and charging Markov. He smashes him once, I forget that Thagrosh has 2 intial attacks, and buy another attack to finish Markov off. Seraph 1 Slipstreams Angelius 1 and moves up, but is just out of range of the Demo Core. Angelius 1 then moves over and engages the Kazny, killing one, moving with Ranvenous, and killing the Underboss. Forsaken 1 moves over and grabs the fury off Angelius 1. The Raptors double shot at the Uhlans doing a whole point of damage, and then retreat a couple of inches. Seraph 2 moves up, kills two Demo Core, and wounds two others thanks to Glory of Everblight. The Demo Core leader is then killed by a shot from Angelius 2. Harrier 2 moves up as a sacrifice to engage the Man o' War. This provokes a counter charge from the Wardog who goes chrarging through the Man o' War thanks to Irusk, but fortunately misses the attack. The Swamp Gobbers move up and put the smoke cloud on Serpah 2, and I forget to move Harrier 1 entirely.
Turn 3
Khador
The Demo Core advance and kill Harrier 2. Irusk and Wardog advance and Irusk puts Battlelust on the Man' o War. He then makes a boosted shot at Forsaken 2 but misses. The Man 'o War charge Seraph 2 but are forced to Combined Melee Attack due to the Swamp Cloud. The first hit does 12 points of damage, but I get lucky and the second CMA misses, leaving the Serpah without his Mind. The Iron Fnags move over to screen Irusk and Shield Wall. The Uhlans run to engage the Raptors while the Great Bears run after them up the field. The Kazny surround Angelius 1 and do 6 points.
Thagrosh leeches to full and upkeeps nothing. Forsaken 1 moves to the Kazny and Blight Shrouds, killing them all. Seraph 1 moves out of cambat and spends all its fury to kill the Man o' War leader. Thagrosh feats, casts Glory of Everblight, and charges the Man o' War. I remember his second attack and he hammers them all down, but Indy actually starts making his tough rolls. It takes all of Thagrosh's fury to kill two and leave the last one knocked down. Serpah 1 then moves over and vaporises the final knocked down Man o' War. Harrier 1 runs into the far left section and I win on scenario.
Afterward
Hubris didn't turn out to be much of a problem, but I kept a Seraph and a Forsaken nearby epic Thagrosh the whole game just in case this came up. I think as long as you keep the initiative it shouldn't be too much of an issue, but a different army with more sacrificial models could be a real pain. I worry about both Skorne and Menoth when it comes to this.
My friend Alex (Indy on the forums) had beaten my Rhyas army last week with his no jack eIrusk army. I wanted a re-match and it seemed a good time to try out Epic Thagrosh, who had just been released this week. We both played semi-themed armies. I had all the wings I could reasonably stuff in, while his army was mostly made of Iron Fangs and Man o' War.
Armies
Legion 
Thgrosh, the Messiah

Thgrosh, the Messiah
Angelius
Angelius
Seraph
Seraph
Harrier
Harrier
Forsaken
Forsaken
Deacon + 4 Riders
Swamp Gobbers
Khador

Supreme Kommandant Irusk
War Dog
Great Bears of Gallowswood
Sergeant + 7 Pikemen
Iron Fang Officer & Standard Bearer
Iron Fang Officer & Standard Bearer
Kovnik Markov
Kapitan + 4 Uhlans
Kapitan + 4 Demolishers
Kapitan + 3 Shocktroopers
Capo + 6 Kayazy
Kayazy Assassin Underboss
Scenario
The scenario was Break the Line. The board is diveided into six 14" by 16" sections. A player controls a section if he has one or more models completely within the section and his opponent has none. For a unit to control the section the entire unit must be in it, and models with CMD 1 or less, fleeing models, wrecked warjacks, and wild beasts do not count when checking for control.
Set Up
Indy won the roll and chose to go first. The Kazny were set up on the far left with Markov beside them. Then came the Demo Core who were set up behind the trees. Next were the Man o' War, with eIrusk and the Wardog set up behind them. Then came the Iron Fangs, with the Great Bears behind, with the Uhlans set up on the far right.
My set up put Harrier 1 on my far left, but not as for over as the Kazny. Beside it was Forsaken 1 with Angelius 1, Seraph 1 and Angelius 2 behind the trees. Epic Thagsoh stood in the open with Forsaken 2 beside him and the Swamp Gobbers over 3" behind. Seraph 2 and Harrier 2 were close beside with the Raptors positioned on my far right.
Turn 1
Khador

The Kazny run forward with Markov beside them. The Man o' War and Iron Fangs move forward and Shield Wall, while the Uhlans run up the flank. Irusk and Wardog then move up behind the Man o' War and casts Artifice of Deviation in the woods and Tactical Supremacy on the Man o' War. The Demo Core then run through the woods while the Great Bears run up behind the Iron Fangs. The Man O' War then take their Tactical Supremacy 3 inch move.
Legion

I begin with Thagrosh and start by casting Slipstream, Unnatural Aggression on Angelius 2, and Dragon's Blood on Seraph 2. Thagrosh then moves forward, slipstreaming Seraph 2, and ends with his base partially in the woods. Seraph 1 Slipstreams Angelius 1 and ends in the woods. Angelius 2 then runs forward to the broken wall. Forsaken 1 moves up and takes the fury off Serpah 1. Seraph 2 runs forward and Forsaken 2 move up and takes the fury off him. Harrier 2 runs forward to screen the approach to Thagrosh. Angelius 1 and Harrier 1 run to the centre of the ruin. Finaly the Raptors move up, shoot at the Uhlans doing nothing before backing off a little, while the Swamp Gobbers move up and put the cloud on Thagrosh, Forsaken 2 and Harrier 2.
Turn 2
Khador
Indy doesn't upkeep Tactical Supremacy. The Uhlans advance slightly while the Iron Fangs and Man o' War advance and Shield Wall. The Man o' War shoot at Harrier 2 but are out of range. Irusk and Wardog move up behind the Man o' War and Irusk casts Artifice of Deviation on the ruins beside Angelius 1. He then shoots Harrier 2, reducing it to 1 wound. Then Demo Core in the woods run while the Kazny run beside the wall. Markov then charges through the Artifice into Angelius 2. He gets no criticals though, and only does 6 points of damage. The Great Bears move in tight behind the Iron Fangs.
Legion

Thagrosh leeches to full and upkeeps Dragon's Blood on Seraph 2. He then starts the turn by casting Glory of Everblight and charging Markov. He smashes him once, I forget that Thagrosh has 2 intial attacks, and buy another attack to finish Markov off. Seraph 1 Slipstreams Angelius 1 and moves up, but is just out of range of the Demo Core. Angelius 1 then moves over and engages the Kazny, killing one, moving with Ranvenous, and killing the Underboss. Forsaken 1 moves over and grabs the fury off Angelius 1. The Raptors double shot at the Uhlans doing a whole point of damage, and then retreat a couple of inches. Seraph 2 moves up, kills two Demo Core, and wounds two others thanks to Glory of Everblight. The Demo Core leader is then killed by a shot from Angelius 2. Harrier 2 moves up as a sacrifice to engage the Man o' War. This provokes a counter charge from the Wardog who goes chrarging through the Man o' War thanks to Irusk, but fortunately misses the attack. The Swamp Gobbers move up and put the smoke cloud on Serpah 2, and I forget to move Harrier 1 entirely.
Turn 3
Khador

The Demo Core advance and kill Harrier 2. Irusk and Wardog advance and Irusk puts Battlelust on the Man' o War. He then makes a boosted shot at Forsaken 2 but misses. The Man 'o War charge Seraph 2 but are forced to Combined Melee Attack due to the Swamp Cloud. The first hit does 12 points of damage, but I get lucky and the second CMA misses, leaving the Serpah without his Mind. The Iron Fnags move over to screen Irusk and Shield Wall. The Uhlans run to engage the Raptors while the Great Bears run after them up the field. The Kazny surround Angelius 1 and do 6 points.
Legion

Thagrosh leeches to full and upkeeps nothing. Forsaken 1 moves to the Kazny and Blight Shrouds, killing them all. Seraph 1 moves out of cambat and spends all its fury to kill the Man o' War leader. Thagrosh feats, casts Glory of Everblight, and charges the Man o' War. I remember his second attack and he hammers them all down, but Indy actually starts making his tough rolls. It takes all of Thagrosh's fury to kill two and leave the last one knocked down. Serpah 1 then moves over and vaporises the final knocked down Man o' War. Harrier 1 runs into the far left section and I win on scenario.
Afterward
An interesting game. I played regular Thagrosh alot and it was an nice contrast. Funnily enough I didn't find his epic version to be much better in melee than the regualr version. Regular Thagosh could have done all the killing that epic Thagrosh did this game. The big difference is the wings. Terrain doesn't impede him the same way, but more importantly, neither do other models. Thagrosh is invariably behind something else, and being able to charge through and past your screening models is a big advantage. It makes Hubris more explainable because otherswise I think epic Thagrosh could dismantle armies single handedly by jumping on and destroying different sections.
The signiture spell is definately Glory of Everblight. The only way I can describe it is that it makes you feel lucky. Your rolls tend to come through for you. You aren't getting much better than average, but you hardly ever get the run of bad rolls that can screw you over. Dragon's Blood is also a solid spell. It's essentially a Legion version of Arcane Shield, and that is never a bad thing. Unnatural Aggression I was less impressed with. Now the army I faced didn't have much shooting in it, but it occured to me that even if they had shot my Angelius I wouldn't have dared to advance it since the nearby Khador models would have just torn it into shreds. So in actual play I think this spell is a bit more marginal than it looks on paper. Black Chasm and Flesh Eater both suffer from being a bit too expensive to cast with Glory of Everblight, so I didn't use them this game. Again they seem a bit situational, but more games will tell.
Hubris didn't turn out to be much of a problem, but I kept a Seraph and a Forsaken nearby epic Thagrosh the whole game just in case this came up. I think as long as you keep the initiative it shouldn't be too much of an issue, but a different army with more sacrificial models could be a real pain. I worry about both Skorne and Menoth when it comes to this.
Cylena Raefyll & Nyss Hunters
I finaly finished painting this unit up. I took it with me to PAX 2008 unfinished so it's been a long time coming, but I'm pretty happy with how they turned out in the end.


Thursday, 26 March 2009
Rhyas


Tuesday, 10 March 2009
Baldur vs Rhyas - Process of Elimination
500 pts Circle vs Legion
Defenstrator put together my Gnarlhorn Satyr so I finally have the chance to try him out. I'd been planning to add him to the Baldur army I've been using (switching out the Warpwolf) and I'm curious to see how he does on the tabletop.
Circle

Baldur the Stonecleaver
Woldwarden
Gnarlhorn Satyr
Woldwatcher
Beast Lord + 5 Tharn Ravagers
Sentry Stone and Mannikins
Legion

Rhyas, Sigil of Everblight
Carnivean
Seraph
Nephilim
Apostle + 2 Warmongers
Shepherd
War Chief
War Chief
Scenario
The table had been left set up from the gaming night the day before so Defenstrator suggested that we just play Process of Elimination. The table was divided into four sections running north to south. At the end of each player's turn they would receive a victory point if they controled a section. Starting on the first player's third turn victory could be achieved by having collected 3 points. The player can only receive the points for controlling the section once and the normal rules for who controls or contests apply.
The left hand side of the board was one long, low hill with a stand on ruins running down its spine, a single ruin in the centre of the board and the right hand side was a stand of trees at north and south separated by a small hill with a small ruin on it.
I won the roll and elected to go first. I put Baldur front and centre and the Woldwarden a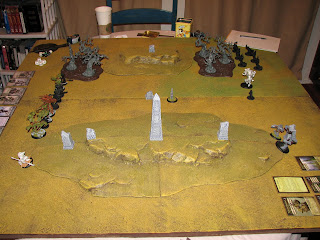 t the far end of his control area behind the hill. The Ravagers camped behind the trees and the Gnarlhorn hung out with Baldur. The Waldwatcher was placed beside the Woldwarden when putting down the advance deployment troops and the Sentry Stone was placed as close to the centre of the table as possible.
 t the far end of his control area behind the hill. The Ravagers camped behind the trees and the Gnarlhorn hung out with Baldur. The Waldwatcher was placed beside the Woldwarden when putting down the advance deployment troops and the Sentry Stone was placed as close to the centre of the table as possible.
Defenstrator put Rhyas slightly off centre of Baldur, closer to the hill than the trees and surrounded her with the Shepherd to her right and the Carnivean on her left. The Sheraph was beside the Shepherd and the Warmongers were beside the Carnivean with the Nephilim beside them. Behind the hill on the left and the trees on right he placed each of his War Chiefs.
Circle Turn 1
A Mannikin popped into existance behind the Sentry Stone to begin the turn then the Woldwarden moved up onto the hill and was followed by the Woldwatcher who put Vigilance on the big guy. The Gnarlhorn simply moved up and riled for two Fury and the Ravagers ran into the trees. Baldur walked forward and toward the hill before casting Earth's Blessing on the Gnarlhorn and Rapid Growth in the area beside the Sentry Stone to make it difficult for the Warmongers to move up the field.
Legion Turn 1

Rhyas cast Rapport on the Carnivean and Slip Stream on herself and then Dash. She moved up 8" and dragged the Carnivean forward. The Warmongers ran forward behind the Rapid Growth forest and both War Chiefs ran onto their respective hills. The Carnivean assaulted the Sentry Stone with a boosted hit and damage on the spray to do 7 points to the rock (apparently Defenstrator hates my Sentry Stone as much as I hate his Seraph).
The Serpah ran (flew?) up the hill and put itself behind the central piller while the Nephilim riled for 1 Fury and ran behind the Warmongers. The Shepherd followed the Seraph up onto the hill.
Circle Turn 2
Baldur leeched to full Fury and upkept both spells as the Sentry Stone created another Mannikin in front of it.
The Sentry Stone was able to steal Fury from both the Carnivean and the Nephilim. The new Mannikin moved forward beside the Warmongers, turned to face them and Splintered into teeny tiny bits. A boosted damage roll produced 9 wounds to the Apostle and 3 wounds to the next Warmonger in the line. The final Warmonger was spared any damage. The Mannikin that had been ignored the first turn moved forward and managed to Root the Carnivean.
Baldur threw an Earth Spikes at the Carnivean with a boosted hit roll. He didn't get the critical and only did 2 points of damage. The Gnarlhorn took up a position slightly in front of Baldur and riled for 2 Fury while the Ravagers spread out in the trees on the other side of the board.
The Woldwarden cast Earth Spikes at the Seraph but missed with his boosted roll. The deviation didn't do anything useful. Finally, the Woldwatcher moved to stand beside Baldur, put Vigilance on the Woldwarden and used Stone Form on itself to screen my warlock.
 on the Woldwarden and used Stone Form on itself to screen my warlock.
Legion Turn 2
Rhyas leeched the 3 Fury that were left to her and upkept Rapport.
The Seraph used Slip Stream and moved back a bit on the hill to really cozy up to the piller. The Shepherd was dragged forward by the animus before the Serpah began shooting the Gnarlhorn. It hit, getting 5 extra shots, and did 9 points total to the Gnarlhorn. The Shepherd charged the Satyr and did an additional 3 points, nearly removing his Body spiral and putting him into Torpor.
The Carnivean walked forward to spray the Sentry Stone again and managed to kill it. The Warmongers ran onto the hill and stood staring at the Gnarlhorn.
Rhyas put Spiny Growth on the Nephilim and moved in behind the Warmongers. Finally, the Nephilim moved up beside the Carnivean.
Circle Turn 3

Baldur leeched back up to full Fury and decided to drop both of his upkeep spells. The Gnarlhorn managed to shake off the Torpor.
The Woldwarden cast Earth Spikes at the Apostle. With a boosted hit roll he got the critical knockdown, taking out Rhyas and a second Warmonger as well. The damage was enough to kill the leader of the group and the AOE did 2 points on Rhyas.
Baldur walked up to the Shepherd and killed her easily. He cast Earth Spikes on the prone Rhyas and did an additional 11 points. He then used Broken Earth... Just in case.
The Woldwatcher walked up the kill so he could get a clear view and shot his Elemental Strike at Rhyas. A boosted hit and damage roll meant that the Legion warlock was Fertilizer.
Afterword
Myantek
The debut for my Gnarlhorn and all he does is stand around and get shot... Oh well, I still like him. He does add something to the army: threat range. The Counter Slam is a nice ability and was handy at making Defenstrator think about getting too close to Baldur. It meant that he didn't do much beyond act as Baldur's bodyguard but that was enough this game.
The Sentry Stone was dynamite! It distracted the Carnivean for two turns, stole enough Fury that Rhyas had a blah turn and let the Mannikin nearly destroy the Warmonger Apostle. Then the other Mannikin managed to Root the Carnivean in place for a turn. That's not bad for 25 points!
I tried to convince Defenstrator to place a tree in Rhyas' place for the final picture, but he wouldn't go for it. It's just not that often that the Woldwatcher actually manages to shoot something, much less kill it and turn it into Fertilizer.
Defenstrator
Hmmm. I thought I had it all figured out. Everything was all set up to force Myantek to either move in and engage me or hang back and get shot some more. I even spent Rhyas's last two fury to put Spiny Growth on the Nephilim because I though I could use him to bait out her Ravagers. Instead I end up just a little too close to my Warmongers and Rhyas trips and takes a header due to a little earth tremor. Myantek makes fun of my determined efforts to get rid of the Sentry Stone, but as the one turn showed, you have to get rid of that thing or it ends up dominating the ground the armies fight over. I thought I had killed it fast enough that I could now settle into the rest of the fight. After all, I hadn't taken much damage at that point. But then I got assassinated so the rest of the battle never took place.
I'm sort of surprised at myself. I had learned from playing against Kaya that you need to keep fury on your warlock just in case. It might be conservative, but caution never accidently got anyone killed. But with Rhyas two fury down it felt wrong to damage her just to get fury that I might not even need, and that would stop me from fully leeching next turn. I thought it better to keep Rhyas empty, but then wasn't cautious enough with her placement. Myantek responded with an opening gambit that had no downside even if it didn't knock down Rhyas. And when it did the killing came fast and hard.
Monday, 2 March 2009
Ironclad #1
I completed my first ironclad as part of the Feb painting challenge. There wasn't much converting on it aside from cutting and twisting the hammer hand, but I did replace the standard Ironclad head with the one from the Stormclad. I think the martial knightly helmet and rounded curves fit better on the chasis than the regular head.


Subscribe to:
Comments (Atom)