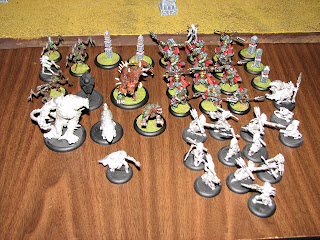
In Mark 3 PP decided to make Swordsmen more of a staple and priced them accordingly. The funny thing is I liked them in Mark 2 just fine, and like them a bit less in the Mark 3 environment. Yes there's lots of jacks for them to beat up on, but infantry clearing got better as well, and aside from their DEF 14 Swordsmen are pretty squishy.
Showing posts with label Legion. Show all posts
Sunday, 28 August 2016
Wednesday, 12 August 2015
Blighted Nyss Hex Hunters and Bayal, Hound of Everblight
The Hex Hunters are a pretty solid unit.They give Legion some desperately needed magic attacks and are solid in melee with MAT 7 and two attacks if you get off Battle Wizard. They can also normally get where they need thanks to high SPD, decent DEF, Stealth, and Pathfinder.
Bayal on the other hand.... He'd make a solid solo. As a Unit Attachment I rarely take him. I find that when I want him to go in the Hex Hunters are either in the way or want to be backing off. He would be so much better if he could just wander around the battlefield doing his own thing. Instead the two drag each other in different directions.
Sunday, 22 September 2013
Captain Farilor and Legionnaire Unit Standard
Farilor and Standard are an interesting unit attachment, because they transform the feel of the Legionnaires a lot. At 6 points the Legionnaires are a good throw away unit and can get in the way of incoming models and feed the Spawning Vessel when they die. At 3 points for the Unit Attachment they become an 9 point unit that you rather expect to get some work done.
This means I only take Farilor in certain lists. Generally ones where there is some way to stack the durability he provides the Legionnaires with something else. When stacked with Epic Thagrosh's Dragons Blood for example, the Legionnaires are a solid ARM 18 all the time, and an impressive ARM 22 and immune to being made Stationary or knocked down when they use Iron Zeal. Otherwise I don't bother with Farilor and let the Legionnaires feed the Vessel.
Friday, 21 August 2009
Saeryn
I finaly finished the details on Saeryn so here she is. The pose is a blatant copy of a Saeryn that I saw on the Privateer Press modelling forum. I'd give credit but I can't remember their name. At any rate I think the change of pose with her about to throw the knife and covered face really helps her match Rhyas's ninja look. 


Friday, 7 August 2009
Typhon
Typhon is done at last. This model has taken me forever to do so it's a real weight off to finally have him done. The colour scheme is the same as my other Legion beasts, Catachan Green to Camo Green and Scorched Brown to a Vermin Fur + Blazing Orange mix. But to try and make him a little more special I stratiated the green heavily and highlighted the brown up into an orangish hue.


Thursday, 6 August 2009
Krueger vs Saeryn, Break the Line
Krueger vs Saeryn, 500 points
Armies
Circle:
Krueger the Stormwrath
Woldwarden
Woldwarden
Woldwryd
Shifting Stones
Shifting Stones
6 Druids of Orboros
Wayfarer
Legion:
Saeryn, Omen of Everblight
Angelius
Seraph
Seraph
5 Raptors
Forsaken
Swamp Gobbers
Scenario
We played Break the Line from the Steamroller 4 rules. Basically it's a control the board scenario. A player wins by controlling 2 zones on his or her side of the table and one zone on the opponent's side.
Set Up
I won the roll and elected to go first. Krueger got placed close to the centre of the table by some trees. The Woldwyrd settled in slightly behind him with a Woldwardan on the far edge of either side of his control area. The Druids hid behind the hill on the far left of the table and the Waywafer took up a position on the far right. When the advanced deployment phase came the Shifting Stones were placed in front of each of the Woldwardens.
Defenstrator set Saeryn up directly opposite Krueger with the Angelius in front of her. The Swamp Gobbers settled in behind her while both Seraphs were placed by the hill on the left of the board with a Forsaken to follow them. On the far right of the table the unit of Raptors were placed behind the ruins.
Circle Turn 1
Woldwarden 1 moved forward into Shifting Stones 1 and put up Undergrowth with the second Woldwarden doing exactly the same thing on the other side of the board.
Krueger cast Skyborne and Wind Storm before moving in front of the trees. The Woldwyrd followed him and was riled for 1 Fury.
The Wayfarer moved up beside Woldwarden 2 and the Druids ran to Woldwarden 1.
Legion Turn 1
The Raptors moved forward onto the hill near the mid-line of the board.

Saeryn cast Respawn on the Angelius and moved forward. The Angelius ran to the ruins.
The Seraphs moved onto the hill and riled for 3 and 2 Fury respectively and the Forsaken moved up to remove the Fury from Serpah 1.
The Swamp Gobbers moved up behind Saeryn and let off a smoke cloud that concealed Saeryn and only touched the Angelius.
Circle Turn 2
So far things were going OK for me. It's pretty much what I expected when battling Defenstrator. I knew I wasn't going to win based on scenario because I couldn't hold a zone on my side from the Raptors so I had to make him hurt this turn. I came up with a plan, started to put it into effect and then screwed up. I finished my turn looked at the table and thought, "Guess this will be a short battle report." Anyway...
The Woldwyrd moved up beside Woldwarden 1 and cast Arkane Killer on it. Krueger cast Skyborne and moved in front of the Woldwyrd and cast Lightning Tendrils on Woldwarden 1. He then cast Windstorm again and let loose his feat. It missed Saeryn, did 2 points to Seraph 2 and 1 point to the Angelius.
The Shifting Stones teleported Woldwarden 2 to the ruins. It attempted to cast lightning at the Seraphs but was just sort. Instead it riled for 1 point and cast Undergrowth. The Druids ran from the Raptors into the trees and the second set of Stones teleported Woldwarden 1 into the ruins.
The Woldwarden then started pounding on the Angelius. The first blow did 12 points! The second blow... missed. Damn. I was hoping for the chain attack to send the Angelius flying. I guess I might as well kill it. Two more hits and the Angelius went down. Only to Respawn 3 inches away. Staring directly at Krueger and liking its lips.
Legion Turn 2
Serpah 1 frenzied! It attacked its buddy and did 15 points taking out Seraph 2's Spirit and Mind! Defenstrator complained about Krueger's feat.
Saeryn moved into the ruins and cast Breath Stealer at Krueger and missed. Defenstrator complained about Krueger's Sky Borne. She then took out her knives and threw them at my warlock doing 2 points of damage.
The Angelius moved in on Krueger and boosted its hit roll. It hits, boosts damage, and Krueger dies. In one blow. Even if Saeryn hadn't hit him. Defenstrator said it had an equal chance of missing. I'm not so sure on that.
Afterword
Myantek
Sigh.
So there are a bunch of things I could have done that I only realised once I finished my turn and shook my head in shame. Placing storm templates in the Angelius' way so it wouldn't be so easy to get to Krueger. Making the other Woldwarden go second and trying to Chain Lightning the Respawned Angelius. I only had to do three points. I might have at least forced Saeyrn to spend some Fury to heal it. I could have moved the Stones and had the Woldwarden trample over to block Krueger. I could've listened to Defenstrator explain Respawn and realise that when I killed the Angelius it was going to come back, away from the Woldwarden and be able to do something.
I still had another turn before Defenstrator was going to be able to win by scenario. I could've made better use of it.
Defenstrator
To be fair, I really did only have an even chance of hitting Krueger. With Sky Borne he is effectively DEF 17, so the Angelius needed an eleven on 3d6. To be honest I was on pins and needles that last turn. One Seraph was useless, the other half dead, meaning Saeryn and Angelius were the only things that could get him. When Saeryn flubbed Breathstealer and damage roll for the knives I thought the game was up. Luckily for me the dice broke my way and Kruger ended up impaled. If I had rolled a ten or less it would have been Saeryn's turn to be standing in the open waiting for death. So I felt this one was tighter than it looked.
Armies
Circle:
Krueger the Stormwrath
Woldwarden
Woldwarden
Woldwryd
Shifting Stones
Shifting Stones
6 Druids of Orboros
Wayfarer
Legion:
Saeryn, Omen of Everblight
Angelius
Seraph
Seraph
5 Raptors
Forsaken
Swamp Gobbers
Scenario
We played Break the Line from the Steamroller 4 rules. Basically it's a control the board scenario. A player wins by controlling 2 zones on his or her side of the table and one zone on the opponent's side.
Set Up
I won the roll and elected to go first. Krueger got placed close to the centre of the table by some trees. The Woldwyrd settled in slightly behind him with a Woldwardan on the far edge of either side of his control area. The Druids hid behind the hill on the far left of the table and the Waywafer took up a position on the far right. When the advanced deployment phase came the Shifting Stones were placed in front of each of the Woldwardens.
Defenstrator set Saeryn up directly opposite Krueger with the Angelius in front of her. The Swamp Gobbers settled in behind her while both Seraphs were placed by the hill on the left of the board with a Forsaken to follow them. On the far right of the table the unit of Raptors were placed behind the ruins.
Circle Turn 1
Woldwarden 1 moved forward into Shifting Stones 1 and put up Undergrowth with the second Woldwarden doing exactly the same thing on the other side of the board.
The Wayfarer moved up beside Woldwarden 2 and the Druids ran to Woldwarden 1.
Legion Turn 1
The Raptors moved forward onto the hill near the mid-line of the board.
Saeryn cast Respawn on the Angelius and moved forward. The Angelius ran to the ruins.
The Seraphs moved onto the hill and riled for 3 and 2 Fury respectively and the Forsaken moved up to remove the Fury from Serpah 1.
The Swamp Gobbers moved up behind Saeryn and let off a smoke cloud that concealed Saeryn and only touched the Angelius.
Circle Turn 2
So far things were going OK for me. It's pretty much what I expected when battling Defenstrator. I knew I wasn't going to win based on scenario because I couldn't hold a zone on my side from the Raptors so I had to make him hurt this turn. I came up with a plan, started to put it into effect and then screwed up. I finished my turn looked at the table and thought, "Guess this will be a short battle report." Anyway...
The Woldwyrd moved up beside Woldwarden 1 and cast Arkane Killer on it. Krueger cast Skyborne and moved in front of the Woldwyrd and cast Lightning Tendrils on Woldwarden 1. He then cast Windstorm again and let loose his feat. It missed Saeryn, did 2 points to Seraph 2 and 1 point to the Angelius.
The Shifting Stones teleported Woldwarden 2 to the ruins. It attempted to cast lightning at the Seraphs but was just sort. Instead it riled for 1 point and cast Undergrowth. The Druids ran from the Raptors into the trees and the second set of Stones teleported Woldwarden 1 into the ruins.
The Woldwarden then started pounding on the Angelius. The first blow did 12 points! The second blow... missed. Damn. I was hoping for the chain attack to send the Angelius flying. I guess I might as well kill it. Two more hits and the Angelius went down. Only to Respawn 3 inches away. Staring directly at Krueger and liking its lips.
Legion Turn 2
Serpah 1 frenzied! It attacked its buddy and did 15 points taking out Seraph 2's Spirit and Mind! Defenstrator complained about Krueger's feat.
Saeryn moved into the ruins and cast Breath Stealer at Krueger and missed. Defenstrator complained about Krueger's Sky Borne. She then took out her knives and threw them at my warlock doing 2 points of damage.
The Angelius moved in on Krueger and boosted its hit roll. It hits, boosts damage, and Krueger dies. In one blow. Even if Saeryn hadn't hit him. Defenstrator said it had an equal chance of missing. I'm not so sure on that.
Afterword
Myantek
Sigh.
So there are a bunch of things I could have done that I only realised once I finished my turn and shook my head in shame. Placing storm templates in the Angelius' way so it wouldn't be so easy to get to Krueger. Making the other Woldwarden go second and trying to Chain Lightning the Respawned Angelius. I only had to do three points. I might have at least forced Saeyrn to spend some Fury to heal it. I could have moved the Stones and had the Woldwarden trample over to block Krueger. I could've listened to Defenstrator explain Respawn and realise that when I killed the Angelius it was going to come back, away from the Woldwarden and be able to do something.
I still had another turn before Defenstrator was going to be able to win by scenario. I could've made better use of it.
Defenstrator
To be fair, I really did only have an even chance of hitting Krueger. With Sky Borne he is effectively DEF 17, so the Angelius needed an eleven on 3d6. To be honest I was on pins and needles that last turn. One Seraph was useless, the other half dead, meaning Saeryn and Angelius were the only things that could get him. When Saeryn flubbed Breathstealer and damage roll for the knives I thought the game was up. Luckily for me the dice broke my way and Kruger ended up impaled. If I had rolled a ten or less it would have been Saeryn's turn to be standing in the open waiting for death. So I felt this one was tighter than it looked.
Labels:
Battle Report,
Circle Oboros,
Cirlce,
Hordes,
Krueger,
Legion,
Legion of Everblight,
miniature games,
Saeryn
Friday, 1 May 2009
Angelius #2
So I finaly have my second Angelius painted up. He was the priority in my March painting challenge because I wanted to have time to do epic Thagrosh in April. I had encountered tipping problem with my first Angelius so I mounted this one lower down. The body is directly attached to the lead weight that weighs down the base. A large pin is driven through the weight and the two halves of the Angelius's body as the main attachment. I then drove a second stabalizing pin through the tail into the side of the weight. The cork rocks were then built up around it as camouflage. I also notice that I accidently got a bit of grey paint on the tail as I was doing the base. I'll have to fix that.


Labels:
Angelius,
Hordes,
Hordes painted miniatures,
Legion,
Miniature Painting
Wednesday, 1 April 2009
Epic Thagrosh vs Epic Kaya- Contested Ground
Legion vs Circle -750 Points
Myantek had only played epic Kaya a few times so this seemed the perfect match up for my second game with epic Thagrosh. I took the exact same army as my previous game.
Legion
Thagrosh, the Messiah
Angelius
Angelius
Seraph
Seraph
Harrier
Harrier
Forsaken
Forsaken
Deacon + 4 Riders
Swamp Gobbers Bellows Crew
Circle
Kaya the Moonhunter + Laris
Warpwolf
Pureblood Warpwolf
Wold Wyrd
Argus
Huntress + 9 Bloodtrackers
Huntsman + 9 Wolves
Wolves of Oboros Officer and Totem Bearer
Blackclad Wayfarer
Sentry Stone & Mannikins
Shifting Stones
Swamp Gobbers Bellows Crew
Scenario
The scenario was Contested Ground. Divide the battlefield between deployment zones into four 12" wide Territories running north to south. A player controls a Territory if he has one or more models completely within the Territory and his oppononet has no models completely within the Territory. For a unit to control a Territory all models in the unit still in play must be completely within the Territory. A warrior model must have a CMD greater than 1 to control a Territory. Ignore wrecked or inert warjacks, wild warbeasts, and fleeing models when checking for control. A player scores one Control Point for each Terrirtory he controls at the end of each of his turns. Players cannot score Control Points during the first round of the game.
Set Up
I won the role and chose to go first. My set up from left to right wasRaptors, Harrier 1, Seraph 1 with Forsaken 1 behind it, Angelius 1, and Epic Thagrosh with the Swamp Gobbers just over 3 inches behind him. Next behind the forest were Seraph 2, Harrier 2 and Forsaken 2, with Angelius 2 on the far right.
Opposite me from left to right were the Blackclad and Warpwolf, epic Kaya and Laris in the centre, and then the Wold Wyrd, Argus, and Pureblood, with the Wolves on the far right. I had no advance deploy units so Myantek then placed her Sentry Stones about a third of the way in from each side of the board, her Shifting Stones in front of the Warpwolf, and the Bloddtrackers inside the woods. The Bloodtrackers choose Angelius 1 as their Prey.

Turn 1
Legion
Angelius 1 starts the turn simply by running forward. Thagrosh activates next and casts Unnatural Aggression on Angelius 1 and Slipstream. He walks forward, Slipstreams Seraph 2, and castsDragon's Blood on Angelius 2. Angelius 1 moves to put pressure on the Bloodtrackers and runs to the rock in front of them with Harrier 1 also moving there to help screen it. Seraph 1 runs up behind them to help with the counter attack and the Raptors move up beside them, unable to shoot due to the Bloodtrackers Stealth. Forsaken 1 advances and grabs the fury off of Seraph 1. Seraph 2 now Slipstreams and advances through the forest, dragging Thagrosh forward another 2 inches. Harrier 2 riles and runs, meaning I am now running hot but I expect ot loose fury to the Sentry Stones. Forsaken 2 runs after Harrier 2 while the Swamp Gobbers advance and put smoke on Thagrsoh, who is also partially in the trees, and Seraph 2.
Circle
The Sentry Stones begin the turn. Sentry Stone 1 steals a fury from Angelius 1. Its Manniken then attacks Angelius 1 with a boosted attack and Roots it. The same happens for Sentry Stone 2 on Angelius 2.The Wolves of Oboros run up the right flank while on the left flank the Blackclad advances and casts Wilding at the Raptor leader, but misses. The Warpwolf takes +2 ARM and runs into the centre of the Shifting Stones, which then activate and teleport it into the woods behind the Bloodtrackers. The Wold Wyrd then activates and puts Arcane Killer on the Argus before riling and advancing. The Argus walks up beside the Wold Wyrd and the Pureblood moves up behind the Argus. Kaya now activates. She advances, puts Forced Evolution on the Argus and casts Mistwalker. Laris moves up beside her and riles. The Bloodtrackers feel unsupported and decide to retreat deeper into the woods while the Swamp Gobbers put smoke on Kaya and Laris.
Turn 2
Legion
Thagrosh leeches everything and recieves a free fury from the Anthanc to make him full and both Dragon's Blood and Unnatural Aggression are upkeptHe then starts the turn by casting Slipstream and Glory of Everblight before advancing through the trees and Slipstreaming Seraph 2. Angelius 2 advances, Thrusts and boosts damage on Sentry Stone 2 to kill it, and retreats 3 inches via Ravenous. Angelius 1 does the same to Sentry Stone 1. Seraph 2 then advances to a rock in front of Angelius 2 and unloads on the Wold Wyrd and Argus. I don't assign quite enough shots to the Wold Wyrd and it ends up surviving with 2 points left on its Spirit. The Argus takes 6 points of damage.The Raptors charge the Shifting Stones, wounding one and destroying another, before moving back out of the way. Seraph 1 casts Slipstream, drags Harrier 1 up, and shhots at the Bloodtrackers, killing the front 2. Harrier 1 then casts True Strike and charges out of Thagrosh's control area into the Blackclad, killing him. Forsaken 1 just moves up behind the group, bit not too close because of the Raptors, while over on the far right Harrier one runs a bit while Forskaen 2 advances and grabs the fury off it. The Swamp Gobbers then edge forward some more to put the cloud on Thagrosh. I recieve a point at the end of my turn for the Harrier ontroling the far left Territory.
Circle
Kaya leeches for full and upkeeps Forced Evolution. The Wolves of Oboros start the turn out strong by popping their mini-feat Wild Hunt and charging Seraph 2, quickly killing it. Laris runs to the right while Kaya advances and casts Muzzle at Angelius 2, missing it. She then uses her feat Call of the Hunt and teleports to Laris. The Wold Wyrd casts Arcane killer on the Argus again before teleporting off behind Kaya. The Argus then charges Angelius 2 but the rolls don't come through and he only does 6 points of damage to the currently ARM 19 beast before teleporting to Kaya. The Pureblood Warpwolf then teleports in fornt of Kaya followed by the regular Wapr Wolf who takes +2 ARM and stands beside her. The Bloodtrckers then ambuscade Serpah 1, hurting it badly and destroying its mind, while the Shifting Stones position themselves to block Harrier. The Swamp Gobbers advance forward. Things are definately heating up. While the Warpwolves didn't do anything Myantek now has most of her army near Thagrosh while he is relatively alone.
Turn 3
Legion
Thagrosh leeches for full and upkeeps Dragon's Blood. Harrier 1 frenzies and does 2 points to a nearby Sentry Stone. Thagrosh heals Seraph 1 for a point, casts Slipstream and Glory of Everblight, and uses his feat Dragon Storm (coolest feat name ever). He then advances, moving Angelius 2 forward, and sprays Blight Fire over the Wolves and Pureblood. Unfortunately they were on a hill so only one Wolf was killed, but the Pureblood was hit taking six points of damage and was set on fire. Angelius 2 then charges the Pureblood and does 31 points of damage on its Thrust attack. The Pureblood spends a fury to transfer the damage to the Warpwolf. I had totally forgotten they could do that and get the feeling I am now in big trouble. The Angelius continues attacking and manages to do six more points to the Pureblood. Harrier 2 then casts True Strike, charges, and kills a Wolf thereby breaking their unit coherencey, while Forsaken 2 advances behind.
On the left side of the board the Raptors chrage the Bloodtrackers, killing 3 of them before retreating back out of the way. Seraph 1 then moves up and attacks, but even with Glory of Everblight fails to hit. Angelius 1 then moves up and pegs off the Bloodtracker Huntress, which causes them to run. The Swamp Gobbers then move into the trees and put a cloud on Thagrosh while Forsaken 1 runs right. With all the activations done Dragon Storm takes effect. Angelius 2 manages to put another 5 points on the Pureblood, but when Harrier 2 moves and attacks it as well fails to hit. Angelius 1 and Seraph 1 both move over to support Thagrosh and miss with their shooting attacks. I get a second point for holding the inner left Territory with Seraph 1.
Circle
Kaya drops Forced Evolution and leeches to full. The Bloodtrackers run through the woods but manage to rally, contesting both of the left hand Territories. To add to that the fire goes out on the Pureblood and Myantek is all set to counter attack. The Wolves in formation charge Harrier 2, but don't manage to kill it. It is left at one wound with no Mind or Spirit. The rest of the Wolves move to form coherency and one dies to a free strike as they move. The Argus runds forward while the Wold Wyrd puts Arcane Killer on the Pureblood. The Pureblood then spends a fury on Ferocity (re-roll missed melee attacks) and uses its 3 initial attacks and 5 fury to keep buying attacks on Angelius 1 until it dies a squishy death. Hemmed in by Harrier 2 Laris attacks it, but misses. Kaya heals the Warpwolf for 2 points and casts Mistwalker. The Warpwolf then regenerates a further point and the turn ends with the Swamp Gobbers moving over to put a smoke cloud on Kaya, Laris, and the Warpwolves.
Turn 4
Legion
Thagrosh leeches. Harrier 1 frenzies and destroys a Shifting Stone. Harrier 1 still has a fury but passes Threshold. The Raptors move forward and shoot at the Bloodtrackers, killing one. They then use their second move to engage them. Forsaken 2 now charges the single Wolf of Oboros engaging Thagrosh. It spends a fury point to boost the hit, but still misses. Now I have a problem. Forsaken 1 runs to the far right to contest the zone. I then do some precise measuring and find that Thagrosh can stay the same distance away from the Wolf but circle around him towards the Pureblood. Thagrosh's base size plus reach is enough to engage the Pureblood so Thagrosh casts Glory of Everblight and kills it, using his second attack to kill another Wolf.
Seraph 1 Slipstreams Angelius 1 and shoots up the Argus for 10 points, destroying its Body. Angelius 1 now charges the Warpwolf, killing it with a single Thrust attack, from which Kaya reaves the fury. The Angelius uses its Ravenous move to reach Kaya and whacks her for 9 points of damage. Harrier 2 moves to Kaya, casts True Strike, and does 3 more points to Kaya. Lastly the Swamp Gobber edge forward some more and put the 5 inch swamp cloud down over Thagrosh. I get no points because the Bloodtrackers are contesting both the left side zones.
Circle
It's do or die time for Kaya and she leeches herself full. The Wolves seize their moment and charge Thagrosh. The first CMA whacks him for 12 points, at which point I forget that Thagrosh can make a lesser beast. But I get lucky and the second CMA misses while the third only does 3 more points of damage. Laris activates next and takes 12 points from a free strike when walking away from the Angelius. Kaya then teleports to Laris and begins to pound away on Thagrosh, but can only reduce him to 1 wound. As the last thing in range to attack the Argus seizes its moment. Unfortunately it misses its first attack and the second one bounces due its lack of Body.
Turn 5
Legion
Thagrosh leeches for full. He is standing next to a Kaya who has no fury and there is a Harrier within his control area. Kaya explodes in an Erruption of Ash.
Afterword
Defenstrator
Tight game. I felt Myantek did a good job denying me scenario points while massing her force by my warlock. A better run of luck and the game would have been hers. This match Hubris turned out to be a much larger factor. Trapped by the Wolf it was impossible for Thagrosh to escape. All I could do was kill the largest threats and brace for the coming attack. I found the spells to be about as useful as my last match. Glory of Everblight was dead solid. It didn't give me super high rolls this game but I didn't suffer any runs of bad luck with my beasts. Dragon's Blood was solid for pushing the Angelius to ARM 19. Unnatural Aggerssion on the other hand didn't do anything because Myantek just chose to withdraw and then attack something else instead. And neither of the direct damage spells were even cast.
Thagrosh himself seems to be cementing a reputation of being mad, bad, and dangerous to know. He is not a warlock your opponent can expect to survive if they end their activation too near to him, and that engenders a certain healthy repsect in your opponent. They want to get close, but they worry about moving too close and getting insta-gibbed. The rest of the army seems to be working alright, but I could definately see trading a Harrier for a Shredder. The lack of defensive spells and animi is pretty nerve wracking at times. Aside from that it seems to be working alright, although I worry about fighting lists that have a larger ranged complement.
Myantek
One more point. If Defenstrator had remembered to pop Shredders as Thagrosh got hurt I don't really think it would have changed my strategy that much. I might have saved up a Fury to heal the Argus and maybe he might have done a little damage. As it was I really didn't have the choice. It was a do or die turn. I either killed Thagrosh and won or tried to hold him off a turn and lost to scenario when the Raptors killed the Bloodtrackers to get those two zones they were contesting. Killing the Swamp Gobbers would have given him the last point he needed.
I wish I'd had a War Wolf rather than the Swamp Gobbers. When I made the army I had exactly 15 points left so I threw the Gobbers in there for completeness. The War Wolf would have been more useful (if I owned one anyway). I would have had to drop a Wolf, but I've got 12 of them.
I'm still working on balancing aggression. I think I could have done more with the Bloodtrackers. It was only my second time playing with them and I haven't really figured out their tactics quite right. Same with the Blackclad. It was the first time I played with him. I almost teleported him right to one of the Forsaken but decided to wait a turn as Defenstrator turned his attention to destroying the Bloodtrackers. Then he was dead and I'd missed my chance.
Myantek had only played epic Kaya a few times so this seemed the perfect match up for my second game with epic Thagrosh. I took the exact same army as my previous game.
Legion
Thagrosh, the Messiah
Angelius
Angelius
Seraph
Seraph
Harrier
Harrier
Forsaken
Forsaken
Deacon + 4 Riders
Swamp Gobbers Bellows Crew
Circle
Kaya the Moonhunter + Laris
Warpwolf
Pureblood Warpwolf
Wold Wyrd
Argus
Huntress + 9 Bloodtrackers
Huntsman + 9 Wolves
Wolves of Oboros Officer and Totem Bearer
Blackclad Wayfarer
Sentry Stone & Mannikins
Shifting Stones
Swamp Gobbers Bellows Crew
Scenario
The scenario was Contested Ground. Divide the battlefield between deployment zones into four 12" wide Territories running north to south. A player controls a Territory if he has one or more models completely within the Territory and his oppononet has no models completely within the Territory. For a unit to control a Territory all models in the unit still in play must be completely within the Territory. A warrior model must have a CMD greater than 1 to control a Territory. Ignore wrecked or inert warjacks, wild warbeasts, and fleeing models when checking for control. A player scores one Control Point for each Terrirtory he controls at the end of each of his turns. Players cannot score Control Points during the first round of the game.
Set Up
I won the role and chose to go first. My set up from left to right wasRaptors, Harrier 1, Seraph 1 with Forsaken 1 behind it, Angelius 1, and Epic Thagrosh with the Swamp Gobbers just over 3 inches behind him. Next behind the forest were Seraph 2, Harrier 2 and Forsaken 2, with Angelius 2 on the far right.
Opposite me from left to right were the Blackclad and Warpwolf, epic Kaya and Laris in the centre, and then the Wold Wyrd, Argus, and Pureblood, with the Wolves on the far right. I had no advance deploy units so Myantek then placed her Sentry Stones about a third of the way in from each side of the board, her Shifting Stones in front of the Warpwolf, and the Bloddtrackers inside the woods. The Bloodtrackers choose Angelius 1 as their Prey.
Turn 1
Legion
Angelius 1 starts the turn simply by running forward. Thagrosh activates next and casts Unnatural Aggression on Angelius 1 and Slipstream. He walks forward, Slipstreams Seraph 2, and castsDragon's Blood on Angelius 2. Angelius 1 moves to put pressure on the Bloodtrackers and runs to the rock in front of them with Harrier 1 also moving there to help screen it. Seraph 1 runs up behind them to help with the counter attack and the Raptors move up beside them, unable to shoot due to the Bloodtrackers Stealth. Forsaken 1 advances and grabs the fury off of Seraph 1. Seraph 2 now Slipstreams and advances through the forest, dragging Thagrosh forward another 2 inches. Harrier 2 riles and runs, meaning I am now running hot but I expect ot loose fury to the Sentry Stones. Forsaken 2 runs after Harrier 2 while the Swamp Gobbers advance and put smoke on Thagrsoh, who is also partially in the trees, and Seraph 2.
Circle
The Sentry Stones begin the turn. Sentry Stone 1 steals a fury from Angelius 1. Its Manniken then attacks Angelius 1 with a boosted attack and Roots it. The same happens for Sentry Stone 2 on Angelius 2.The Wolves of Oboros run up the right flank while on the left flank the Blackclad advances and casts Wilding at the Raptor leader, but misses. The Warpwolf takes +2 ARM and runs into the centre of the Shifting Stones, which then activate and teleport it into the woods behind the Bloodtrackers. The Wold Wyrd then activates and puts Arcane Killer on the Argus before riling and advancing. The Argus walks up beside the Wold Wyrd and the Pureblood moves up behind the Argus. Kaya now activates. She advances, puts Forced Evolution on the Argus and casts Mistwalker. Laris moves up beside her and riles. The Bloodtrackers feel unsupported and decide to retreat deeper into the woods while the Swamp Gobbers put smoke on Kaya and Laris.
Turn 2
Legion
Thagrosh leeches everything and recieves a free fury from the Anthanc to make him full and both Dragon's Blood and Unnatural Aggression are upkeptHe then starts the turn by casting Slipstream and Glory of Everblight before advancing through the trees and Slipstreaming Seraph 2. Angelius 2 advances, Thrusts and boosts damage on Sentry Stone 2 to kill it, and retreats 3 inches via Ravenous. Angelius 1 does the same to Sentry Stone 1. Seraph 2 then advances to a rock in front of Angelius 2 and unloads on the Wold Wyrd and Argus. I don't assign quite enough shots to the Wold Wyrd and it ends up surviving with 2 points left on its Spirit. The Argus takes 6 points of damage.The Raptors charge the Shifting Stones, wounding one and destroying another, before moving back out of the way. Seraph 1 casts Slipstream, drags Harrier 1 up, and shhots at the Bloodtrackers, killing the front 2. Harrier 1 then casts True Strike and charges out of Thagrosh's control area into the Blackclad, killing him. Forsaken 1 just moves up behind the group, bit not too close because of the Raptors, while over on the far right Harrier one runs a bit while Forskaen 2 advances and grabs the fury off it. The Swamp Gobbers then edge forward some more to put the cloud on Thagrosh. I recieve a point at the end of my turn for the Harrier ontroling the far left Territory.
Circle
Kaya leeches for full and upkeeps Forced Evolution. The Wolves of Oboros start the turn out strong by popping their mini-feat Wild Hunt and charging Seraph 2, quickly killing it. Laris runs to the right while Kaya advances and casts Muzzle at Angelius 2, missing it. She then uses her feat Call of the Hunt and teleports to Laris. The Wold Wyrd casts Arcane killer on the Argus again before teleporting off behind Kaya. The Argus then charges Angelius 2 but the rolls don't come through and he only does 6 points of damage to the currently ARM 19 beast before teleporting to Kaya. The Pureblood Warpwolf then teleports in fornt of Kaya followed by the regular Wapr Wolf who takes +2 ARM and stands beside her. The Bloodtrckers then ambuscade Serpah 1, hurting it badly and destroying its mind, while the Shifting Stones position themselves to block Harrier. The Swamp Gobbers advance forward. Things are definately heating up. While the Warpwolves didn't do anything Myantek now has most of her army near Thagrosh while he is relatively alone.
Turn 3
Legion
Thagrosh leeches for full and upkeeps Dragon's Blood. Harrier 1 frenzies and does 2 points to a nearby Sentry Stone. Thagrosh heals Seraph 1 for a point, casts Slipstream and Glory of Everblight, and uses his feat Dragon Storm (coolest feat name ever). He then advances, moving Angelius 2 forward, and sprays Blight Fire over the Wolves and Pureblood. Unfortunately they were on a hill so only one Wolf was killed, but the Pureblood was hit taking six points of damage and was set on fire. Angelius 2 then charges the Pureblood and does 31 points of damage on its Thrust attack. The Pureblood spends a fury to transfer the damage to the Warpwolf. I had totally forgotten they could do that and get the feeling I am now in big trouble. The Angelius continues attacking and manages to do six more points to the Pureblood. Harrier 2 then casts True Strike, charges, and kills a Wolf thereby breaking their unit coherencey, while Forsaken 2 advances behind.
On the left side of the board the Raptors chrage the Bloodtrackers, killing 3 of them before retreating back out of the way. Seraph 1 then moves up and attacks, but even with Glory of Everblight fails to hit. Angelius 1 then moves up and pegs off the Bloodtracker Huntress, which causes them to run. The Swamp Gobbers then move into the trees and put a cloud on Thagrosh while Forsaken 1 runs right. With all the activations done Dragon Storm takes effect. Angelius 2 manages to put another 5 points on the Pureblood, but when Harrier 2 moves and attacks it as well fails to hit. Angelius 1 and Seraph 1 both move over to support Thagrosh and miss with their shooting attacks. I get a second point for holding the inner left Territory with Seraph 1.
Circle
Kaya drops Forced Evolution and leeches to full. The Bloodtrackers run through the woods but manage to rally, contesting both of the left hand Territories. To add to that the fire goes out on the Pureblood and Myantek is all set to counter attack. The Wolves in formation charge Harrier 2, but don't manage to kill it. It is left at one wound with no Mind or Spirit. The rest of the Wolves move to form coherency and one dies to a free strike as they move. The Argus runds forward while the Wold Wyrd puts Arcane Killer on the Pureblood. The Pureblood then spends a fury on Ferocity (re-roll missed melee attacks) and uses its 3 initial attacks and 5 fury to keep buying attacks on Angelius 1 until it dies a squishy death. Hemmed in by Harrier 2 Laris attacks it, but misses. Kaya heals the Warpwolf for 2 points and casts Mistwalker. The Warpwolf then regenerates a further point and the turn ends with the Swamp Gobbers moving over to put a smoke cloud on Kaya, Laris, and the Warpwolves.
Turn 4
Legion
Thagrosh leeches. Harrier 1 frenzies and destroys a Shifting Stone. Harrier 1 still has a fury but passes Threshold. The Raptors move forward and shoot at the Bloodtrackers, killing one. They then use their second move to engage them. Forsaken 2 now charges the single Wolf of Oboros engaging Thagrosh. It spends a fury point to boost the hit, but still misses. Now I have a problem. Forsaken 1 runs to the far right to contest the zone. I then do some precise measuring and find that Thagrosh can stay the same distance away from the Wolf but circle around him towards the Pureblood. Thagrosh's base size plus reach is enough to engage the Pureblood so Thagrosh casts Glory of Everblight and kills it, using his second attack to kill another Wolf.
Seraph 1 Slipstreams Angelius 1 and shoots up the Argus for 10 points, destroying its Body. Angelius 1 now charges the Warpwolf, killing it with a single Thrust attack, from which Kaya reaves the fury. The Angelius uses its Ravenous move to reach Kaya and whacks her for 9 points of damage. Harrier 2 moves to Kaya, casts True Strike, and does 3 more points to Kaya. Lastly the Swamp Gobber edge forward some more and put the 5 inch swamp cloud down over Thagrosh. I get no points because the Bloodtrackers are contesting both the left side zones.
Circle
It's do or die time for Kaya and she leeches herself full. The Wolves seize their moment and charge Thagrosh. The first CMA whacks him for 12 points, at which point I forget that Thagrosh can make a lesser beast. But I get lucky and the second CMA misses while the third only does 3 more points of damage. Laris activates next and takes 12 points from a free strike when walking away from the Angelius. Kaya then teleports to Laris and begins to pound away on Thagrosh, but can only reduce him to 1 wound. As the last thing in range to attack the Argus seizes its moment. Unfortunately it misses its first attack and the second one bounces due its lack of Body.
Turn 5
Legion
Thagrosh leeches for full. He is standing next to a Kaya who has no fury and there is a Harrier within his control area. Kaya explodes in an Erruption of Ash.
Afterword
Defenstrator
Tight game. I felt Myantek did a good job denying me scenario points while massing her force by my warlock. A better run of luck and the game would have been hers. This match Hubris turned out to be a much larger factor. Trapped by the Wolf it was impossible for Thagrosh to escape. All I could do was kill the largest threats and brace for the coming attack. I found the spells to be about as useful as my last match. Glory of Everblight was dead solid. It didn't give me super high rolls this game but I didn't suffer any runs of bad luck with my beasts. Dragon's Blood was solid for pushing the Angelius to ARM 19. Unnatural Aggerssion on the other hand didn't do anything because Myantek just chose to withdraw and then attack something else instead. And neither of the direct damage spells were even cast.
Thagrosh himself seems to be cementing a reputation of being mad, bad, and dangerous to know. He is not a warlock your opponent can expect to survive if they end their activation too near to him, and that engenders a certain healthy repsect in your opponent. They want to get close, but they worry about moving too close and getting insta-gibbed. The rest of the army seems to be working alright, but I could definately see trading a Harrier for a Shredder. The lack of defensive spells and animi is pretty nerve wracking at times. Aside from that it seems to be working alright, although I worry about fighting lists that have a larger ranged complement.
Myantek
One more point. If Defenstrator had remembered to pop Shredders as Thagrosh got hurt I don't really think it would have changed my strategy that much. I might have saved up a Fury to heal the Argus and maybe he might have done a little damage. As it was I really didn't have the choice. It was a do or die turn. I either killed Thagrosh and won or tried to hold him off a turn and lost to scenario when the Raptors killed the Bloodtrackers to get those two zones they were contesting. Killing the Swamp Gobbers would have given him the last point he needed.
I wish I'd had a War Wolf rather than the Swamp Gobbers. When I made the army I had exactly 15 points left so I threw the Gobbers in there for completeness. The War Wolf would have been more useful (if I owned one anyway). I would have had to drop a Wolf, but I've got 12 of them.
I'm still working on balancing aggression. I think I could have done more with the Bloodtrackers. It was only my second time playing with them and I haven't really figured out their tactics quite right. Same with the Blackclad. It was the first time I played with him. I almost teleported him right to one of the Forsaken but decided to wait a turn as Defenstrator turned his attention to destroying the Bloodtrackers. Then he was dead and I'd missed my chance.
Labels:
Battle Report,
Circle,
Hordes,
Legion,
miniature games,
Tabletop Miniatures
Sunday, 29 March 2009
Epic Thagrosh vs Epic Irusk
750 Points- Legion vs Khador
Khador
Scenario
My set up put Harrier 1 on my far left, but not as for over as the Kazny. Beside it was Forsaken 1 with Angelius 1, Seraph 1 and Angelius 2 behind the trees. Epic Thagsoh stood in the open with Forsaken 2 beside him and the Swamp Gobbers over 3" behind. Seraph 2 and Harrier 2 were close beside with the Raptors positioned on my far right.
Turn 1
The Kazny run forward with Markov beside them. The Man o' War and Iron Fangs move forward and Shield Wall, while the Uhlans run up the flank. Irusk and Wardog then move up behind the Man o' War and casts Artifice of Deviation in the woods and Tactical Supremacy on the Man o' War. The Demo Core then run through the woods while the Great Bears run up behind the Iron Fangs. The Man O' War then take their Tactical Supremacy 3 inch move.
I begin with Thagrosh and start by casting Slipstream, Unnatural Aggression on Angelius 2, and Dragon's Blood on Seraph 2. Thagrosh then moves forward, slipstreaming Seraph 2, and ends with his base partially in the woods. Seraph 1 Slipstreams Angelius 1 and ends in the woods. Angelius 2 then runs forward to the broken wall. Forsaken 1 moves up and takes the fury off Serpah 1. Seraph 2 runs forward and Forsaken 2 move up and takes the fury off him. Harrier 2 runs forward to screen the approach to Thagrosh. Angelius 1 and Harrier 1 run to the centre of the ruin. Finaly the Raptors move up, shoot at the Uhlans doing nothing before backing off a little, while the Swamp Gobbers move up and put the cloud on Thagrosh, Forsaken 2 and Harrier 2.
Turn 2
Khador
Thagrosh leeches to full and upkeeps Dragon's Blood on Seraph 2. He then starts the turn by casting Glory of Everblight and charging Markov. He smashes him once, I forget that Thagrosh has 2 intial attacks, and buy another attack to finish Markov off. Seraph 1 Slipstreams Angelius 1 and moves up, but is just out of range of the Demo Core. Angelius 1 then moves over and engages the Kazny, killing one, moving with Ranvenous, and killing the Underboss. Forsaken 1 moves over and grabs the fury off Angelius 1. The Raptors double shot at the Uhlans doing a whole point of damage, and then retreat a couple of inches. Seraph 2 moves up, kills two Demo Core, and wounds two others thanks to Glory of Everblight. The Demo Core leader is then killed by a shot from Angelius 2. Harrier 2 moves up as a sacrifice to engage the Man o' War. This provokes a counter charge from the Wardog who goes chrarging through the Man o' War thanks to Irusk, but fortunately misses the attack. The Swamp Gobbers move up and put the smoke cloud on Serpah 2, and I forget to move Harrier 1 entirely.
Turn 3
The Demo Core advance and kill Harrier 2. Irusk and Wardog advance and Irusk puts Battlelust on the Man' o War. He then makes a boosted shot at Forsaken 2 but misses. The Man 'o War charge Seraph 2 but are forced to Combined Melee Attack due to the Swamp Cloud. The first hit does 12 points of damage, but I get lucky and the second CMA misses, leaving the Serpah without his Mind. The Iron Fnags move over to screen Irusk and Shield Wall. The Uhlans run to engage the Raptors while the Great Bears run after them up the field. The Kazny surround Angelius 1 and do 6 points.
Thagrosh leeches to full and upkeeps nothing. Forsaken 1 moves to the Kazny and Blight Shrouds, killing them all. Seraph 1 moves out of cambat and spends all its fury to kill the Man o' War leader. Thagrosh feats, casts Glory of Everblight, and charges the Man o' War. I remember his second attack and he hammers them all down, but Indy actually starts making his tough rolls. It takes all of Thagrosh's fury to kill two and leave the last one knocked down. Serpah 1 then moves over and vaporises the final knocked down Man o' War. Harrier 1 runs into the far left section and I win on scenario.
Afterward
Hubris didn't turn out to be much of a problem, but I kept a Seraph and a Forsaken nearby epic Thagrosh the whole game just in case this came up. I think as long as you keep the initiative it shouldn't be too much of an issue, but a different army with more sacrificial models could be a real pain. I worry about both Skorne and Menoth when it comes to this.
My friend Alex (Indy on the forums) had beaten my Rhyas army last week with his no jack eIrusk army. I wanted a re-match and it seemed a good time to try out Epic Thagrosh, who had just been released this week. We both played semi-themed armies. I had all the wings I could reasonably stuff in, while his army was mostly made of Iron Fangs and Man o' War.
Armies
Angelius
Angelius
Seraph
Seraph
Harrier
Harrier
Forsaken
Forsaken
Deacon + 4 Riders
Swamp Gobbers
Khador
War Dog
Great Bears of Gallowswood
Sergeant + 7 Pikemen
Iron Fang Officer & Standard Bearer
Kovnik Markov
Kapitan + 4 Uhlans
Kapitan + 4 Demolishers
Kapitan + 3 Shocktroopers
Capo + 6 Kayazy
Kayazy Assassin Underboss
Scenario
The scenario was Break the Line. The board is diveided into six 14" by 16" sections. A player controls a section if he has one or more models completely within the section and his opponent has none. For a unit to control the section the entire unit must be in it, and models with CMD 1 or less, fleeing models, wrecked warjacks, and wild beasts do not count when checking for control.
Set Up
Indy won the roll and chose to go first. The Kazny were set up on the far left with Markov beside them. Then came the Demo Core who were set up behind the trees. Next were the Man o' War, with eIrusk and the Wardog set up behind them. Then came the Iron Fangs, with the Great Bears behind, with the Uhlans set up on the far right.
My set up put Harrier 1 on my far left, but not as for over as the Kazny. Beside it was Forsaken 1 with Angelius 1, Seraph 1 and Angelius 2 behind the trees. Epic Thagsoh stood in the open with Forsaken 2 beside him and the Swamp Gobbers over 3" behind. Seraph 2 and Harrier 2 were close beside with the Raptors positioned on my far right.
Turn 1
The Kazny run forward with Markov beside them. The Man o' War and Iron Fangs move forward and Shield Wall, while the Uhlans run up the flank. Irusk and Wardog then move up behind the Man o' War and casts Artifice of Deviation in the woods and Tactical Supremacy on the Man o' War. The Demo Core then run through the woods while the Great Bears run up behind the Iron Fangs. The Man O' War then take their Tactical Supremacy 3 inch move.
I begin with Thagrosh and start by casting Slipstream, Unnatural Aggression on Angelius 2, and Dragon's Blood on Seraph 2. Thagrosh then moves forward, slipstreaming Seraph 2, and ends with his base partially in the woods. Seraph 1 Slipstreams Angelius 1 and ends in the woods. Angelius 2 then runs forward to the broken wall. Forsaken 1 moves up and takes the fury off Serpah 1. Seraph 2 runs forward and Forsaken 2 move up and takes the fury off him. Harrier 2 runs forward to screen the approach to Thagrosh. Angelius 1 and Harrier 1 run to the centre of the ruin. Finaly the Raptors move up, shoot at the Uhlans doing nothing before backing off a little, while the Swamp Gobbers move up and put the cloud on Thagrosh, Forsaken 2 and Harrier 2.
Turn 2
Khador
Indy doesn't upkeep Tactical Supremacy. The Uhlans advance slightly while the Iron Fangs and Man o' War advance and Shield Wall. The Man o' War shoot at Harrier 2 but are out of range. Irusk and Wardog move up behind the Man o' War and Irusk casts Artifice of Deviation on the ruins beside Angelius 1. He then shoots Harrier 2, reducing it to 1 wound. Then Demo Core in the woods run while the Kazny run beside the wall. Markov then charges through the Artifice into Angelius 2. He gets no criticals though, and only does 6 points of damage. The Great Bears move in tight behind the Iron Fangs.
Thagrosh leeches to full and upkeeps Dragon's Blood on Seraph 2. He then starts the turn by casting Glory of Everblight and charging Markov. He smashes him once, I forget that Thagrosh has 2 intial attacks, and buy another attack to finish Markov off. Seraph 1 Slipstreams Angelius 1 and moves up, but is just out of range of the Demo Core. Angelius 1 then moves over and engages the Kazny, killing one, moving with Ranvenous, and killing the Underboss. Forsaken 1 moves over and grabs the fury off Angelius 1. The Raptors double shot at the Uhlans doing a whole point of damage, and then retreat a couple of inches. Seraph 2 moves up, kills two Demo Core, and wounds two others thanks to Glory of Everblight. The Demo Core leader is then killed by a shot from Angelius 2. Harrier 2 moves up as a sacrifice to engage the Man o' War. This provokes a counter charge from the Wardog who goes chrarging through the Man o' War thanks to Irusk, but fortunately misses the attack. The Swamp Gobbers move up and put the smoke cloud on Serpah 2, and I forget to move Harrier 1 entirely.
Turn 3
The Demo Core advance and kill Harrier 2. Irusk and Wardog advance and Irusk puts Battlelust on the Man' o War. He then makes a boosted shot at Forsaken 2 but misses. The Man 'o War charge Seraph 2 but are forced to Combined Melee Attack due to the Swamp Cloud. The first hit does 12 points of damage, but I get lucky and the second CMA misses, leaving the Serpah without his Mind. The Iron Fnags move over to screen Irusk and Shield Wall. The Uhlans run to engage the Raptors while the Great Bears run after them up the field. The Kazny surround Angelius 1 and do 6 points.
Thagrosh leeches to full and upkeeps nothing. Forsaken 1 moves to the Kazny and Blight Shrouds, killing them all. Seraph 1 moves out of cambat and spends all its fury to kill the Man o' War leader. Thagrosh feats, casts Glory of Everblight, and charges the Man o' War. I remember his second attack and he hammers them all down, but Indy actually starts making his tough rolls. It takes all of Thagrosh's fury to kill two and leave the last one knocked down. Serpah 1 then moves over and vaporises the final knocked down Man o' War. Harrier 1 runs into the far left section and I win on scenario.
Afterward
An interesting game. I played regular Thagrosh alot and it was an nice contrast. Funnily enough I didn't find his epic version to be much better in melee than the regualr version. Regular Thagosh could have done all the killing that epic Thagrosh did this game. The big difference is the wings. Terrain doesn't impede him the same way, but more importantly, neither do other models. Thagrosh is invariably behind something else, and being able to charge through and past your screening models is a big advantage. It makes Hubris more explainable because otherswise I think epic Thagrosh could dismantle armies single handedly by jumping on and destroying different sections.
The signiture spell is definately Glory of Everblight. The only way I can describe it is that it makes you feel lucky. Your rolls tend to come through for you. You aren't getting much better than average, but you hardly ever get the run of bad rolls that can screw you over. Dragon's Blood is also a solid spell. It's essentially a Legion version of Arcane Shield, and that is never a bad thing. Unnatural Aggression I was less impressed with. Now the army I faced didn't have much shooting in it, but it occured to me that even if they had shot my Angelius I wouldn't have dared to advance it since the nearby Khador models would have just torn it into shreds. So in actual play I think this spell is a bit more marginal than it looks on paper. Black Chasm and Flesh Eater both suffer from being a bit too expensive to cast with Glory of Everblight, so I didn't use them this game. Again they seem a bit situational, but more games will tell.
Hubris didn't turn out to be much of a problem, but I kept a Seraph and a Forsaken nearby epic Thagrosh the whole game just in case this came up. I think as long as you keep the initiative it shouldn't be too much of an issue, but a different army with more sacrificial models could be a real pain. I worry about both Skorne and Menoth when it comes to this.
Subscribe to:
Posts (Atom)