Showing posts with label Rhyas. Show all posts

Friday, 30 October 2015

Rhyas vs Irusk - Incoming

Legion vs Khador - Incoming, 50 Points

    Time for my first battle report since 2013. Ironically my opponent Birch, who hasn't played Irusk for ages, dragged him out again just recently so it looks like there will be two Irusk battle in a row. He won the last one vs Stryker, let's see what happened this time.

Army Lists

Legion of Everblight

Rhyas, Sigil of Everblight
Succubus
Typhon
Nephilim Bolt Thrower
Shredder
Blighted Nyss Swordsmen - Leader and 9 Grunts
Abbot & Champion - Blighted Nyss Swordsmen Unit Attachmen
Blighted Ogryn Warmongers - Leader and 4 Grunts
Blighted Ogryn Warspear - Leader and 4 Grunts
Warspear Chieften - Blighted Ogryn Warspear Unit Attachment
Blighted Nyss Shepherd
Warmonger Warchief
Warmonger Warchief

   Rhyas was also played using the Rearguard theme list from No Quarter issue 36. The list was Tier 4.The benefits granted are Stealth for the army first turn, a free Swordsmen Unit Attachment, Friendly models/units begin the game with Rhyas's upkeep spells in play and she pays no Fury to upkeep them, and Blighted Ogryn models gain Advance Deployment.

Khador

Kommandant Irusk
Sylys Wyshnalyrr
Ruin
Assault Kommandos - Leader and 9 Grunts
Assault Kommando Flame Thrower x 3- Assault Kommandos Weapon Attachment
Iron Fang Pikemen - Leader and 9 Grunts
Iron Fang Officer and Standard - Iron Fang Unit Attachment
Kayazy Eliminiators
Winter Guard Rifle Corps - Leader and 9 Grunts
Kovnik Jozef Grigorrovich
Iron Fang Kovnik
Alexia, Mistress of the Witchfire
Ragman
Gorman di Wulfe, Rogue Alchemist

Scenario

Incoming

    Mark two zones (12x6 rectangles). Each one will be 8" from the side table edge and one each will be  24" from each players board edge. Place an objective marker 24" from the side and 16"in from each players board edge. The zone and objective closer to the players side are friendly. Starting on the second players second turn a player earns control points (CP) as follows:
-Friendly Zone: Dominate = 1 CP
-Enemy Zone: Control + 1 CP, Dominate = 2 CP
-Enemy Objective Destroyed = 1 CP

   To Dominate a zone a warcaster/ warlock must be in it with no other enemy models. To control a zone a warjack/beast, unit, or solo must be fully in the zone with no enemy models.Each player had an objective. Birch picked Armoury, while I picked Bunker.

Armoury- DEF 5 ARM 18 Damage Boxes 15
Asset Protection- If this model is disabled, you can choose a non-disabled friendly model within 4" to be destroyed. If another model is destroyed as a result of Asset Protection, remove one damage point from this model.

Firepower- While within 4" of this model, friendly models with light artillery gain boosted attack rolls.

Immobile- This model has no movement or action and cannot be knocked down or moved. Its front arc extends 360 degrees. It has no melee range, cannot engage, and is automatically hit by melee attacks.

Objective- This model cannot be placed, cannot channel spells, and cannot be chosen as a Prey target. This model cannot be targeted or damaged until the second player's second turn, An objective cannot be engaged.

Bunker- DEF 5 ARM 18 Damage Boxes 15
Girded- This model does not suffer blast damage. Friendly models base to base with it do not suffer blast damage.

Immobile- This model has no movement or action and cannot be knocked down or moved. Its front arc extends 360 degrees. It has no melee range, cannot engage, and is automatically hit by melee attacks.

Impervious Flesh- When this model is hit by a ranged attack, the attacker rolls one less damage die.

Objective- This model cannot be placed, cannot channel spells, and cannot be chosen as a Prey target. This model cannot be targeted or damaged until the second player's second turn, An objective cannot be engaged.

Set Up

Birch

   Birch had chosen to go first. Neither of us had predeployment models. Setting up on my left flank he put his Assault Kommandos. The bulk of the Iron Fnags went on the left centre with the Elminaters, Iron Fang Kovnik, Sylys Wyshnalyrr, and Gorman behind them. Irusk was on the centre with Ruin next to him on the centre right, and the rest of the Iron Fangs beside it. Ragman was tucked in behind Ruin. The Winterguard Riflemen were on the centre right with Kovnik Joe behind them. Epic Alexia took the far right flank.

Defenstrator

   I set up with Rhyas on my centre left with Typhon left of her, the Swordsmen to her right in the centre, and the BoltThrower to their right but still in Rhyas 's CTRL. The Shepherds went behind Typhon and beside the Bolt Thrower. The Shredder sat left of Typhon while the Succubus went behind Rhyas. The Warmongers all had advanced deploy thanks to the theme force. I put one Warchief on each flank, the Warmongers centre right, and the Warspears centre left.

Turn 1

Khador

   Irusk put one focus on Ruin. The Iron Fangs began by having to pass a Terror check for being in Ruin's melee range. They passed and then ran. The Rifle Corps passed their test as well. Irusk put Iron Flesh (Target friendly model/unit gains +3 DEF, -1 SPD) on the Iron Fangs and Superiority (Target friendly Warjack gets +2 SPD, MAT, DEF, cannot be knocked down) on Ruin, then advanced. Ruin ran forward. Silas, the Eliminators, the Assault Kommandos, Gorman, and Alexia all ran forward as well. The Rifle Corps ran and put themselves close enough to Ruin that they had to do another Terror check. They passed. Kovnik Jozef granted Fearless to himself and the unit of Rifle Corps and ran. Ragman ran up behind the Iron Fangs.

Legion

   The turn begins with Rhyas having her upkeeps in play due to the theme list, with Rapport (Target Warbeast uses warlocks MAT and RAT, maytransfer damage for free once per turn even if not in CTRL) on Typhon and Occultation (model/unit gains Stealth) on the Warmongers. The Warspears Assaulted the Iron Fangs, killing one. The Bolt Thrower used its animus and flew forward. The Warmongers ran forward. The Shredder puts Tenacity (+1 to DEF and ARM) on Typhon and advanced. Rhyas cast Dash, advanced to behind the forest, and put Tenacity on two Warspears. The Swordsmen and Warchiefs ran, while the Succubus advanced and put Tenacity on Rhyas. The Shepherds just ran up behind.


 Turn 2

Khador

   Irusk upkept Iron Flesh.Wyshnalyrr upkept Superiority. Kovnik Jozef advances first and cried For the Motherland (affected Winterguard attacks are boosted) before shooting and killing a Swordsman. The Rifle Corps then advanced and unloaded, killing six Swordsmen and putting four damage on a Warmonger and gaining Alexia a soul.

   Irusk then advanced, put Battle Lust (Unit gains Fearless and an additional die on melee damage rolls for one round) on the Iron Fangs, cast Inhospitable Ground (While in casters CTRL enemy models count open terrain as rough), and used his feat Undying Loyalty (While in Irusk's CTRL friendly Faction warrior models/units gain Fearless, Tough, +2 to ranged and melee attack rolls, no knockdown, 4+ Tough if in CTRL).

   The Iron Fangs then advanced in Shield Wall, stabbed two Warspears to death, and put five damage on and knocked down another. They then used their unit mini-feat to Reform forward.  Ragman advanced and used Boneshaker to do two damage to a Warspear with the Iron Fang Kovnik advanced behind the Iron Fangs and Assault Kommandos. The Assault Kommandos used the Assault and Battery order allowing them to shoot before charging. They began by hitting two Warspears with a gas grenade, They then killed a wounded Warspear, put four damage on another, and then did three more damage on the charge. Gorman advanced and put up a cloud to block LOS to Irusk, while Silas and Ruin advanced. The Eliminators ran and had to do a Terror check for getting too near Ruin, but passed. Alexia advanced back behind the forest away from a Warchief.

Legion

   Occultation is dropped, Rapport is upkept by the Succubus. Rhyas cast the Bolt Thrower animus Glider (Self, model gains Flight)  so she could advance through the forest and did so up to the Iron Fangs. Her first attack bounced off the ARM 18, a second was bought which she missed. The third bought was a critical though, which killed the Iron Fang with no tough roll thanks to her Critical Decapitation, after which Rhyas Sprinted back behind the trees.

   The Warmongers then charged, but thanks to the feat and Iron Flesh only killed a single Winterguard Rifle Corps. The Warspears also Assaulted and charged and killed one Iron Fang and one Assault Kommando. The Bolt Thrower shot at Ruin, doing two points of damage while shoving it back an inch. The Warchief on the left flank attacks the Assault Kommandos but missed, while the few remaining Swordsmen charged and just sucked out, accomplishing nothing. Typhon moved in and also accomplished nothing with his sprays. The Warchief on the right flank charged, while the Shpeherds advanced. One hid from Rifle Corps shooting while the other one pulled fury off the Bolt Thrower.

Turn 3

Khador

   Superiority is upkept on Ruin  by Wyshnalyrr and Iron Flesh by Irusk on the Iron Fangs. Ruin received zero focus. Alexia advanced forward and created a Thrall. The Thrall then charged the Warchief on the right flank, damaging it for seven of its eight health. Ruin then advanced and killed the Swordsman Champion, received a soul, spent it for another attack, killed a Warmonger, and gained another soul.

   Ragman then advanced and cast Death Field (this model and models within 3" gain Dark Shroud. Models in melee range of a model with Dark Shroud have -2 ARM) while the Iron Fang Kovinik advanced and gave the Shield March order to the Assault Kommandos. The Assault Kommandos activated next and used their sprays, which were effectively POW 14 thanks to Death Field, to kill a Warspear and the Warspear Chieften UA. Irusk activated next and cast Battlelust on the Iron Fangs and Inhospitable ground. The Iron Fangs activated next and moved up in Shield Wall. They killed two more Warspears, a Warmonger, and put five damage on the Bolt Thrower, while blocking the charge lane to Ruin from Typhon. The Rifle Corps activated and accomplished little. They missed the Shephard they fired at and couldnèt do the last wound to the Warchief. Kovnik Jozef then cried tough. The turn ended with the Eliminators running past Ruin and Gorman advancing and putting up Smoke again.
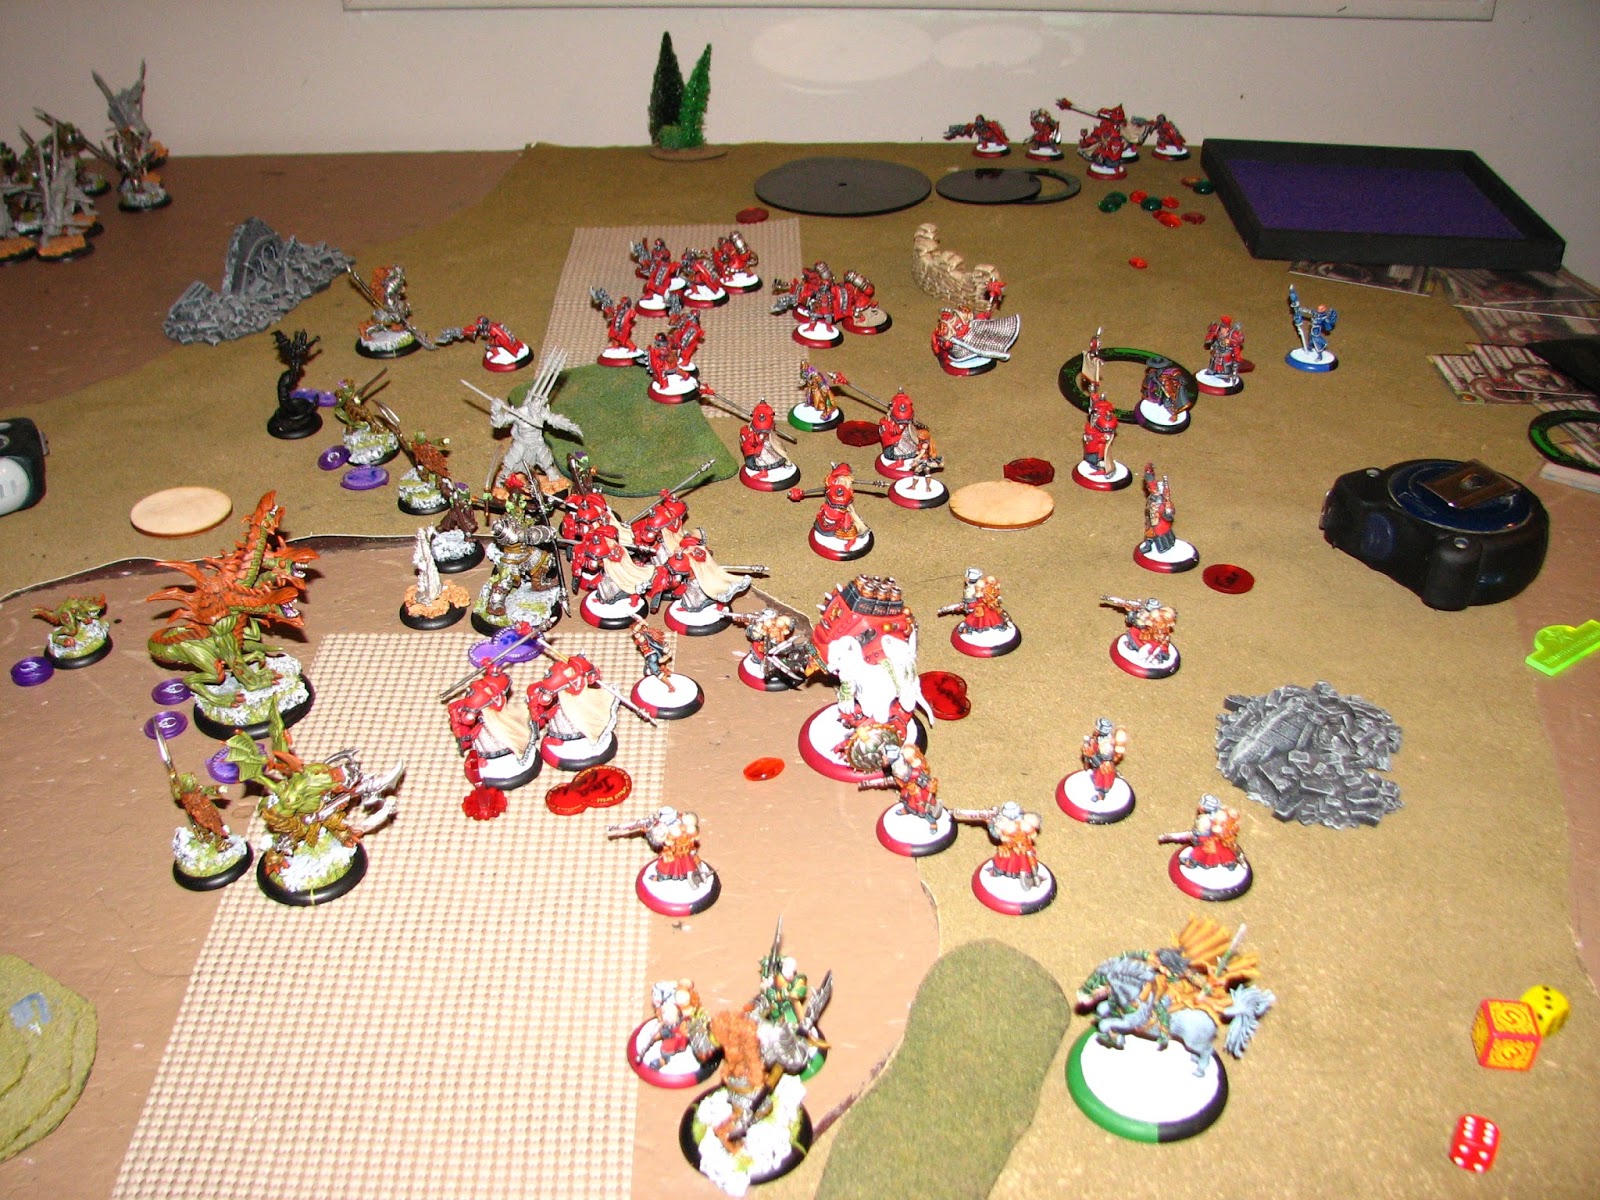
Legion

   Rhyas upkept Rapport for free thanks to the Succubus. The Succubus then advanced away from the Assault Kommandos and cast Tenacity on Rhyas. Rhyas then used her feat Tide of Blood (Rhyas and Friendly models activating in CTRL gain an extra melee attack. The first time a friendly Legion model damages an enemy while in Rhyas's CTRL immediately place it base to base with damaged model) and charged an Eliminator. She killed it, moved to the back of the base, and struck Ruin for two points of damage.

   Then remaining Swordsmen charged and ran to attack the Ironfangs and clear the way for Typhon. The ended up killing three of them. Typhon then charged another Ironfang which made its tough roll, placed behind it which put Typhon in engagement with Ruin, and bought attacks until Ruin was wrecked. With its last attack Typhon killed the Ironfang behind it thanks to its 360 line of sight. The Warchief on the right flank then charged in and killed the newly made Thrall and one Winterguard, before a Tough roll stopped its Beserk. The Warchief on the left Flank just missed and did nothing. The Bolt Throwed then moved up and shot eAlexia through the trees thanks to Eyeless Sight, killing her. The two Shepherds then activated, one removing the Fury from the Bolt Thrower and the other removing one point from Typhon. The Shredder then advanced and put Tenacity on Rhyas. Lastly the reamining Warmonger killed two Iron Fangs and one Winterguard Rifleman.

Turn 4

Khador

   Birch up keeps no spells. Ragman advanced and used Death Field again. The Ironfang Pikemen used the Shield Gaurd order, advanced, and killed the last Warmonger. The Iron Fang Kovnik then advanced and used the Shield March * action (When unit recieves Shield Wall order it gains +2 movement). The Assault Kommandos then advanced and did three damage to a warspear and 6 damage to the Warchief fighting them, mainly with their flamethrowers.

   Gorman then advanced and hit Rhyas with his Black Oil, Blinding her (Model cannot make Ranged or Magic attacks, -4 MAT and DEF, cannot run or charge, must forfiet movement or activation next turn, shakeable thanks to new errata). Kovnik Joe cried For the Motherland and shot Rhyas for three damage. The Winterguard advanced, with one dying to a freestrike to unengage Rhyas, after which they unloaded, doing two more damage to her and forcing her two use her free transfer to Typhon. Wyshnalyrr then activated and used his * action

Arcane Secrets (Rng 3, This models warcaster gains an additional die on its next magic attack and damage roll. Drop the lowest die from the rolls).  Irusk then smacked Rhyas with an Airburt (AOE 3, Target any model in CTRL ignoring line of sight, cover, concealment , elevation, and Stealth. Models  hit take POW 8 blast damage), which smashed her down to two life, but I kept the last transfer. Unable to do a second Airburst or get LOS to Rhyas he then shot the Bolt Thrower for seven damage.

   With Rhyas almost dead but holding one Fury he charged his last model, the second Eliminator. It hit Rhyas and did... no damage. The second attack bounced as well.

Legion

   Rhyas drew in all the Fury on Typhon and one from the Shredder. She then spent one Fruy to shake off the effects of Black Oil, and recent change in the rules as previously this wasn't allowed. The Succubus upkept Rapport for free. The Shredder attacked a Shepherd and killed it. The other Shepherd adcanced and healed two damage on the Bolt Thrower. The Bolt Thrower then advanced and shot Irusk for twelve damage, pushing him back two inches but not knocking him down. Rhyas then charged, boosted attack roll, and criticaled. With her Decapitation going off the amount of damage done to Irusk after ARM was doubled and she did twenty-two damage, killing him.

Afterward

   Birch admitted he messed up his last turn. He had planned to withdraw to the other side of the board, start scoring, and force me to come to him. But once Rhyas was hit with Black Oil he decided to go for it and instead he used Irusk to try and finish Rhyas which left him a bit too close. That said, it was just bad luck he didn't manage to kill her. But if he had decicded this was the turn to kill her at the beginning he could have moved over some Assault Kommandos to try and do so more damage to her instead of the Warspear and Warchief.

   On my side I put Occultation on the Warmongers instead of my Swordsmen, which let the boosted to hit POW 10s of the Riflecore inflict a huge amount of damage on them before they could do anything. The Warmongers ARM 16 and eight wounds would have been a lot better at sucking that shooting up. I was also just lucky that Gorman's Blind has been changed, because before the erratta that would have been game over. Rhyas would have done effectively nothing that turn and would have been waiting to be killed the next one.


Thursday, 26 March 2009

Rhyas

This is my Rhyas figure painted up for Legion. I did her in lots of natural tones and made her armour all leather. Technicaly the embossed parts are metal plates, but I kept them all leather to fit with her speed and acrobatics.


Tuesday, 10 March 2009

Baldur vs Rhyas - Process of Elimination

500 pts Circle vs Legion

Defenstrator put together my Gnarlhorn Satyr so I finally have the chance to try him out. I'd been planning to add him to the Baldur army I've been using (switching out the Warpwolf) and I'm curious to see how he does on the tabletop.

Circle

Baldur the Stonecleaver
Woldwarden
Gnarlhorn Satyr
Woldwatcher
Beast Lord + 5 Tharn Ravagers
Sentry Stone and Mannikins


Legion

Rhyas, Sigil of Everblight
Carnivean
Seraph
Nephilim
Apostle + 2 Warmongers
Shepherd
War Chief
War Chief


Scenario

The table had been left set up from the gaming night the day before so Defenstrator suggested that we just play Process of Elimination. The table was divided into four sections running north to south. At the end of each player's turn they would receive a victory point if they controled a section. Starting on the first player's third turn victory could be achieved by having collected 3 points. The player can only receive the points for controlling the section once and the normal rules for who controls or contests apply.

The left hand side of the board was one long, low hill with a stand on ruins running down its spine, a single ruin in the centre of the board and the right hand side was a stand of trees at north and south separated by a small hill with a small ruin on it.

I won the roll and elected to go first. I put Baldur front and centre and the Woldwarden at the far end of his control area behind the hill. The Ravagers camped behind the trees and the Gnarlhorn hung out with Baldur. The Waldwatcher was placed beside the Woldwarden when putting down the advance deployment troops and the Sentry Stone was placed as close to the centre of the table as possible.

Defenstrator put Rhyas slightly off centre of Baldur, closer to the hill than the trees and surrounded her with the Shepherd to her right and the Carnivean on her left. The Sheraph was beside the Shepherd and the Warmongers were beside the Carnivean with the Nephilim beside them. Behind the hill on the left and the trees on right he placed each of his War Chiefs.

Circle Turn 1

A Mannikin popped into existance behind the Sentry Stone to begin the turn then the Woldwarden moved up onto the hill and was followed by the Woldwatcher who put Vigilance on the big guy. The Gnarlhorn simply moved up and riled for two Fury and the Ravagers ran into the trees. Baldur walked forward and toward the hill before casting Earth's Blessing on the Gnarlhorn and Rapid Growth in the area beside the Sentry Stone to make it difficult for the Warmongers to move up the field.

Legion Turn 1

Rhyas cast Rapport on the Carnivean and Slip Stream on herself and then Dash. She moved up 8" and dragged the Carnivean forward. The Warmongers ran forward behind the Rapid Growth forest and both War Chiefs ran onto their respective hills. The Carnivean assaulted the Sentry Stone with a boosted hit and damage on the spray to do 7 points to the rock (apparently Defenstrator hates my Sentry Stone as much as I hate his Seraph).

The Serpah ran (flew?) up the hill and put itself behind the central piller while the Nephilim riled for 1 Fury and ran behind the Warmongers. The Shepherd followed the Seraph up onto the hill.

Circle Turn 2

Baldur leeched to full Fury and upkept both spells as the Sentry Stone created another Mannikin in front of it.

The Sentry Stone was able to steal Fury from both the Carnivean and the Nephilim. The new Mannikin moved forward beside the Warmongers, turned to face them and Splintered into teeny tiny bits. A boosted damage roll produced 9 wounds to the Apostle and 3 wounds to the next Warmonger in the line. The final Warmonger was spared any damage. The Mannikin that had been ignored the first turn moved forward and managed to Root the Carnivean.

Baldur threw an Earth Spikes at the Carnivean with a boosted hit roll. He didn't get the critical and only did 2 points of damage. The Gnarlhorn took up a position slightly in front of Baldur and riled for 2 Fury while the Ravagers spread out in the trees on the other side of the board.

The Woldwarden cast Earth Spikes at the Seraph but missed with his boosted roll. The deviation didn't do anything useful. Finally, the Woldwatcher moved to stand beside Baldur, put Vigilance on the Woldwarden and used Stone Form on itself to screen my warlock.

Legion Turn 2

Rhyas leeched the 3 Fury that were left to her and upkept Rapport.

The Seraph used Slip Stream and moved back a bit on the hill to really cozy up to the piller. The Shepherd was dragged forward by the animus before the Serpah began shooting the Gnarlhorn. It hit, getting 5 extra shots, and did 9 points total to the Gnarlhorn. The Shepherd charged the Satyr and did an additional 3 points, nearly removing his Body spiral and putting him into Torpor.

The Carnivean walked forward to spray the Sentry Stone again and managed to kill it. The Warmongers ran onto the hill and stood staring at the Gnarlhorn.

Rhyas put Spiny Growth on the Nephilim and moved in behind the Warmongers. Finally, the Nephilim moved up beside the Carnivean.

Circle Turn 3

Baldur leeched back up to full Fury and decided to drop both of his upkeep spells. The Gnarlhorn managed to shake off the Torpor.

The Woldwarden cast Earth Spikes at the Apostle. With a boosted hit roll he got the critical knockdown, taking out Rhyas and a second Warmonger as well. The damage was enough to kill the leader of the group and the AOE did 2 points on Rhyas.

Baldur walked up to the Shepherd and killed her easily. He cast Earth Spikes on the prone Rhyas and did an additional 11 points. He then used Broken Earth... Just in case.

The Woldwatcher walked up the kill so he could get a clear view and shot his Elemental Strike at Rhyas. A boosted hit and damage roll meant that the Legion warlock was Fertilizer.

Afterword

Myantek

The debut for my Gnarlhorn and all he does is stand around and get shot... Oh well, I still like him. He does add something to the army: threat range. The Counter Slam is a nice ability and was handy at making Defenstrator think about getting too close to Baldur. It meant that he didn't do much beyond act as Baldur's bodyguard but that was enough this game.

The Sentry Stone was dynamite! It distracted the Carnivean for two turns, stole enough Fury that Rhyas had a blah turn and let the Mannikin nearly destroy the Warmonger Apostle. Then the other Mannikin managed to Root the Carnivean in place for a turn. That's not bad for 25 points!
I tried to convince Defenstrator to place a tree in Rhyas' place for the final picture, but he wouldn't go for it. It's just not that often that the Woldwatcher actually manages to shoot something, much less kill it and turn it into Fertilizer.

Defenstrator

Hmmm. I thought I had it all figured out. Everything was all set up to force Myantek to either move in and engage me or hang back and get shot some more. I even spent Rhyas's last two fury to put Spiny Growth on the Nephilim because I though I could use him to bait out her Ravagers. Instead I end up just a little too close to my Warmongers and Rhyas trips and takes a header due to a little earth tremor. Myantek makes fun of my determined efforts to get rid of the Sentry Stone, but as the one turn showed, you have to get rid of that thing or it ends up dominating the ground the armies fight over. I thought I had killed it fast enough that I could now settle into the rest of the fight. After all, I hadn't taken much damage at that point. But then I got assassinated so the rest of the battle never took place.
I'm sort of surprised at myself. I had learned from playing against Kaya that you need to keep fury on your warlock just in case. It might be conservative, but caution never accidently got anyone killed. But with Rhyas two fury down it felt wrong to damage her just to get fury that I might not even need, and that would stop me from fully leeching next turn. I thought it better to keep Rhyas empty, but then wasn't cautious enough with her placement. Myantek responded with an opening gambit that had no downside even if it didn't knock down Rhyas. And when it did the killing came fast and hard.

Friday, 24 October 2008

Process of Elimination: Baldur vs Rhyas

500 points - Circle vs Legion

I'll warn you now; there are alot of unpainted minis on the board. We've been playing but not blogging and while it may seem like all we've been doing is painting because of all the painting updates I thought it was time to try something new. So on to Baldur...

Circle:

Baldur the Stonecleaver
Woldwarden
Woldwarden
Woldwatcher
5 Tharn Ravagers + Beastlord
Shifting Stones

Legion:

Rhyas, Sigil of Everblight
Carnivean
Seraph
Nephilim Soldier
Harrier
Shredder
7 Blighted Swordsmen + Vassal
Forsaken
Shepherd
Swamp Gobbers

Set Up

On the far left of the board a small hill was placed with trees at the mid point and another hill on the near side. The middle of the board had a small ruin and the right side of the board was a large hill flanked by two barricades.

Circle began placing models with Woldwarden 1 on the right, Baldur in the middle and the second Woldwarden on the hill. The Ravagers filled in the space between Baldur and the hill. When the advance deployment phase came the Woldwatcher was placed on the hill with the Woldwarden and the Shifting Stones by the barricade close to Woldwarden 2.

On the Legion side the Shepherd and the Seraph were placed on the far left with the Swordmen forming a block in front of them. The Swamp Gobbers and Rhyas were in the middle of the board with the Shredder behind them and the Nephilim and Carnivean were on the far right of the board with a Harrier and the Forsaken behind them.

Scenario

We played the Process of Elimination Scenario from the Steamroller 4.0 tournament rules. There are 4 12" wide territories running north to south on the battlefield. Control of these territories or death of the warlock are the conditions to winning the game.

Circle Turn 1

Baldur began by casting Rapid Growth on the area beside the ruin and then moved forward. Woldwarden 2 moved forward on the hill and riled for 1 Fury and Woldwarden 1 moved into the ring of Stones and riled for 1 Fury as well. The Ravagers ran forward into the new forest and the Stones teleported Woldwarden 1 onto the hill. The Woldwatcher then moved forward with Woldwarden 2.


Legion Turn 1

The Shepherd ran forward off the hill and the Seraph moved to join her. The Swordsmen ran toward the with the Swamp Gobbers close behind. They then threw smoke over the lead Swordsmen. Rhyas cast Rapport on the Carnivean and then cast Dash to move into the cloud around the Swordsmen. The Shredder used Tenacity and moved to join Rhyas. The Nepilim and Carnivean (who used Spiny Growth) both ran up the hill toward Woldwarden 1. The Forsaken moved forward to take 3 Fury off the Carnivean and the Harrier simply ran forward.


Circle Turn 2

Baldur leached all Fury and upkept the Rapid Growth forest for the Ravagers. He then moved forward and cast Earth Spikes at the Swordsmen. It missed, deviated 1" and did no damage.

Woldwarden 2 shuffled into the zone on the far left and used Undergrowth (keeping just inside Baldur's control area). On the far right Woldwarden 2 did the same thing. The Woldwatcher moved forward and used Vigilance on itself. The Ravagers consolidated within the mystical forest and the Stones shifted between the hill and the ruin.

With just the Woldwardens in the outermost control zones I collected 2 points towards a scenario win.

Legion Turn 2

Rhyas leached all the Fury and upkept Rapport.

The Seraph aimed at Woldwarden 2 and, with a boost to hit, managed to get an extra 3 shots. Luckily for me the Woldwarden is a tough nut to crack and only 4 points of damage were done to the construct. The Harrier moved beside the ruin.

Rhyas cast Slipstream and Dash then moved toward the hill. The Carnivean was the target of Slipstream and inched along the hill.

The Shredder moved in behind Rhyas and used Tenacity on her. The Nephilim moved off the hill to join them and put Massacre on the Carnivean. The Carnivean charged Woldwarden 1 and (thanks to Rapport) manages to destroy it. Baldur reaved the Fury because he was going to need it later. The Forsaken moved in behind Rhyas and removed 2 Fury from the Nephilim. The Forsaken was now holding as much Fury as it could.

The Swordsmen charged Baldur and the Ravagers (some of them simply ran to maintain unit coherancy). They missed attacking attacking Baldur but managed to do 3 points of damage to one of the Ravagers.

The Shepherd ran towards the ruin and the Swamp Gobbers moved up to place smoke in front of the Swordsmen.

Circle Turn 3

Baldur leached all the Fury he could but had to leave one on the Woldwatcher. He chose to drop the forest this turn.

The remaining Woldwarden moved out of the trees and cast Earth Spikes on the Swordsmen. It missed and deviated harmlessly away. Taking advantage of Baldur's affinity with constructs, the Woldwatcher charged the Swordsmen. It killed one of them with its second attack.

Baldur engaged 2 Swordsmen and killed them both leaving him one Fury that he chose to keep. He then used his Broken Earth feat to save himself for a turn.

The Ravagers charged the Swordsmen and killed the only one they could reach. The Stones shifted in behind the Ravagers.

Legion Turn 3

Rhyas leached all the Fury she could (using the Shepherd to collect Fury from the out of range Seraph) but had to leave some on the Carnivean. She chose to continue upkeeping Rapport. The Carnivean chose this moment to Frenzy. Luckily for Defenstrator, the configuration of the hill prevented the beast from doing more than moving toward the closest models.

The Seraph shot at the Woldwatcher and once again got 3 extra hits. Unlike the shot at the Woldwarden all 4 shots hit and do a total of 16 points of damage to the smaller construct. Not quite enough to destroy it.

The Swordmen couldn't get any closer to Baldur so backed up around the Seraph instead.

Rhyas cast Dash and Slipstream and moved behind the ruins. The Shepherd ran back toward the hill and the Forsaken moved behind the Nephilim. It used Blight Shroud to remove all the Fury it had accumulated but it did nothing as there were no enemy models in range.

The Swamp Gobbers moved towards Rhyas and continued to lay down smoke and the Harrier benefited from Slip Stream to shift around the ruins. The Shredder and Nehilim continued to move with Rhyas.

Circle Turn 4

Baldur leached all the Fury he could and cast Rapid Growth and Undergrowth as he moved into the midst of the Ravagers.

The Woldwatcher moved into the trees and shot at the Seraph doing only 2 points of damage. The Woldwarden followed and cast Earth Spikes at the Seraph for a further 5 points.

The Ravagers charged the Swordsmen and killed another 2 of them and the Stones teleported in front of Baldur trying to block any possible charge lanes.

Legion Turn 4

Rhyas leached all the Fury from the Seraph but left 1 Fury on the Carnivean. She decided to drop Rapport. The Carnivean then frenzied again. Being actually in range of something he charged and killed the Forsaken. Rhyas then charged the Ravagers and brought forth the Tide of Blood. She managed to kill 3 Ravagers immediately by decapitation and then turned invisible.

The Nephilim charged the Ravagers and killed just one. The Seraph aimed and shot at the Woldwatcher but with only 1 extra hit managed to do just 1 point of damage.

The Shepherd charged the Ravagers and managed to kill the Beast Lord and then moved on to attack the remaining Ravager.

It took a Rabid Shredder to finish off the last Ravager and then it moved onto the Woldwatcher doing another 2 points to it. Finally, a Swordsman managed to kill this construct (Baldur reaved the Fury left on it).

The Swamp Gobbers moved up behind the Nephilim and put smoke on Rhyas, the Shredder and the Shepherd while the Harrier moved through the ruins.

Circle Turn 5

Baldur leached all the Fury available to him and upkept Rapid Growth.

The Woldwarden moved up to Rhyas, used Undergrowth, and attacked. Unsurprisingly, it missed.

Baldur attacked Rhyas and did 14 points (which was enough to kill the Harrier). His next attack did 10 points directly to her, leaving her alive.

Legion Turn 5


Rhyas leached all the Fury she could but the Shredder still Frenzied, doing 4 points to one of the Shifting Stones. The Carnivean still had Fury on it but did not Frenzy this turn.

Rhyas pulled out her sword and attacked Baldur. The first attack missed but the second attack decapitated him (19 points of damage on the critical) and won the game.


Afterword

Myantek

So, apparently Baldur is a bit of a beatstick... I hadn't really realized how potent he could be in melee. I still lost but I had a plan that was sort of working, I just ran out of models. And Fury. I was really in a Fury pinch and now I know why people say an all-construct army doesn't work. It just doesn't produce enough Fury. I guess the trade-off for not Frenzying is not producing as much. I've got some ideas to play around with to tweak this army while I'm painting it but I'm thinking Evolution really opened some doors to a Baldur army.

As for the actual scenario, I don't know if this is one of the ones that were tweaked (I need to find the latest Steamroller rules) but I think it should be. Not being able to claim points from a zone more than once means that, at some point, there's a huge pile in the middle. I got two points relatively easily but for me to get any more I would have had to be killing alot of models. I think it's one of the scenarios that's won by 'lock kill more often than by winning scenario points

Defenstrator

It's been a while since I played Rhyas and I was a bit trepedatious when I found I was going to be up against Baldur. His board control abilities are tough for Rhyas to deal with. Fortunately the damage wasn't too bad on Baldur's feat turn, and Rhyas came through with the Tide of Blood to kill off the Ravagers and Wold Watcher. That was the point where the game turned firmly in my favor, although Bladur almost pulled it off in the end when Myantek rolled a 10+ to hit Rhyas twice in a row.

The game started in a promising way when the Carnivean killed off the first Wold Warden. Unfortunately I didn't get much advantage out of that as the Carnivean frenzied for the next two turns and ended up eating the Forsaken. It basically felt like we had just traded points even though I still had the Carnivean on the table. The biggest advantage killing the Wold Warden gave to me was make it impossible for Baldur to leach more than five fury. As for my own fury problems I have a hard time trying to figure out which beast I would get rid of.